
Guide for uploading XLSX template CQMs via Drag and Drop
TABLE OF CONTENTS
- Guide for uploading XLSX template CQMs via Drag and Drop
- Adding Quality Measures
- Uploading Files (First Upload)
- Monitoring Upload
- Reviewing and Remediating Issues with Uploaded Files
- Uploading Files (Subsequent Uploads)
Adding Quality Measures
Use the following instructions for initial configuration of quality measures. This is required once annually before CQM measure data can be uploaded.
- Login to Patient360: https://app.patient360.com/
- If you submit data for more than one Clinic, choose the Clinic name from the Clinic Name drop-down in the Heading Bar.
- Select the desired reporting year from the Reporting Year drop-down in the Heading Bar.
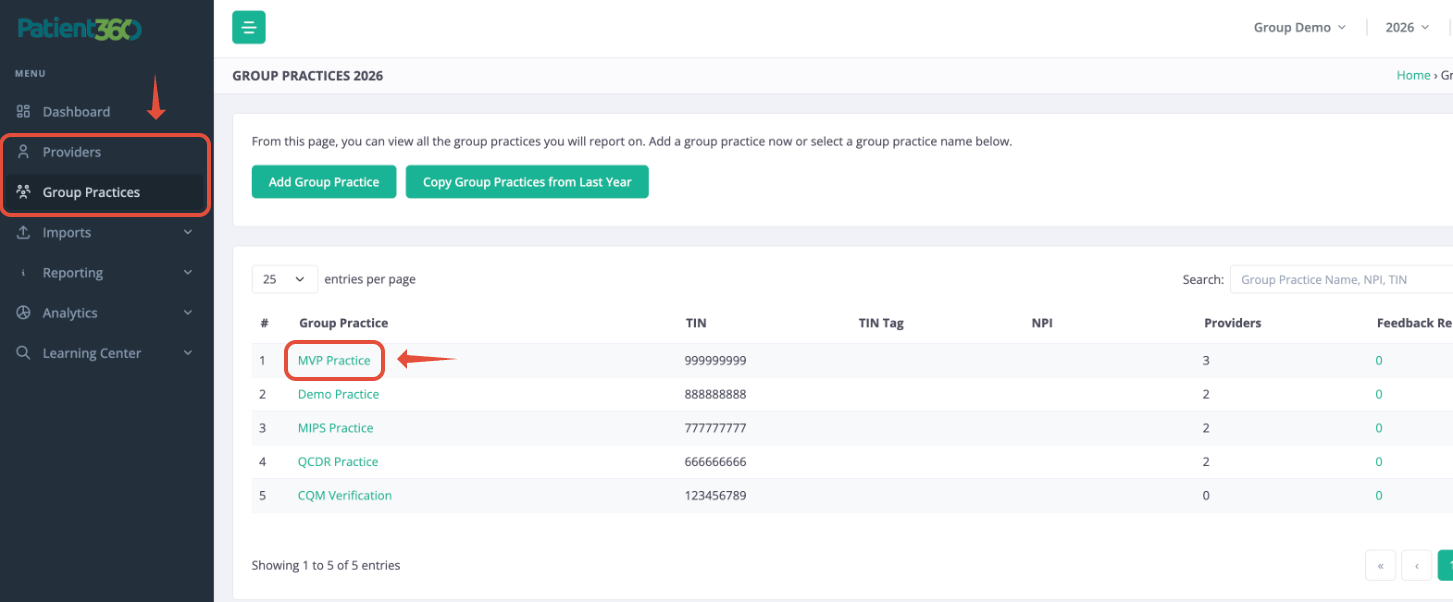
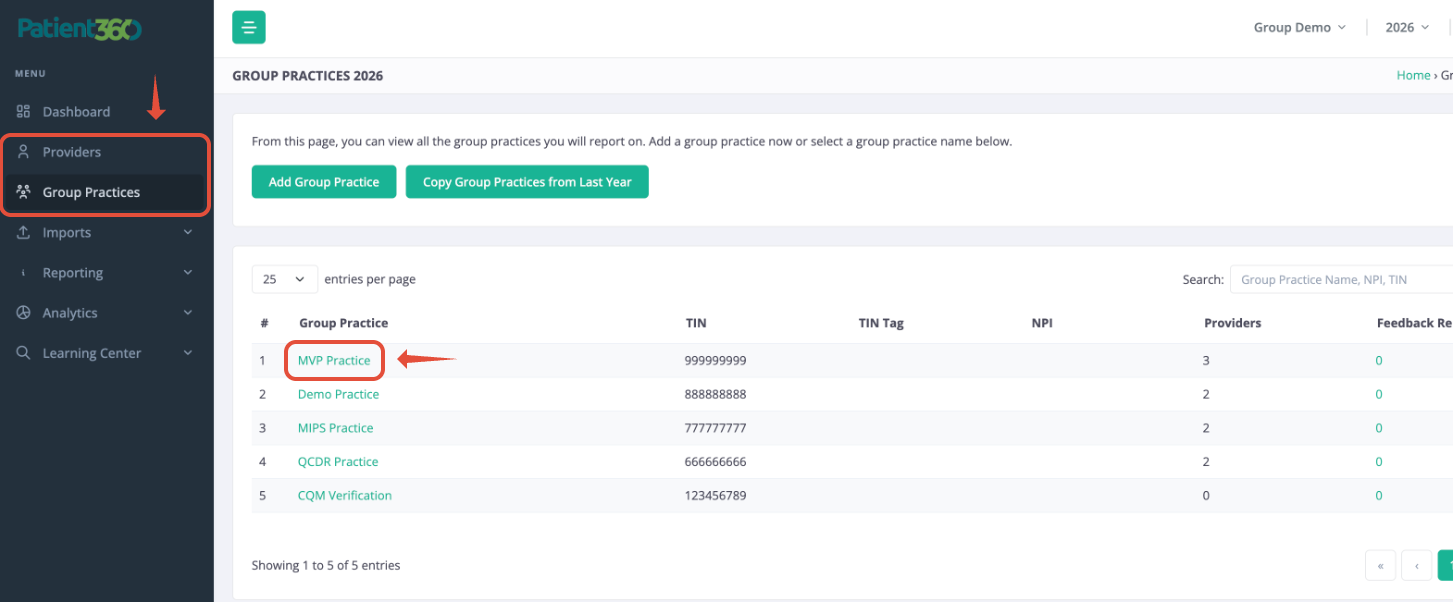
- In the left Navigation Bar, if your practice is reporting as a group, select Group Practices > Group Practices then click on the group practice name in green. If your practice is reporting for Individual providers, select Providers > Providers then click on the provider's name in green.
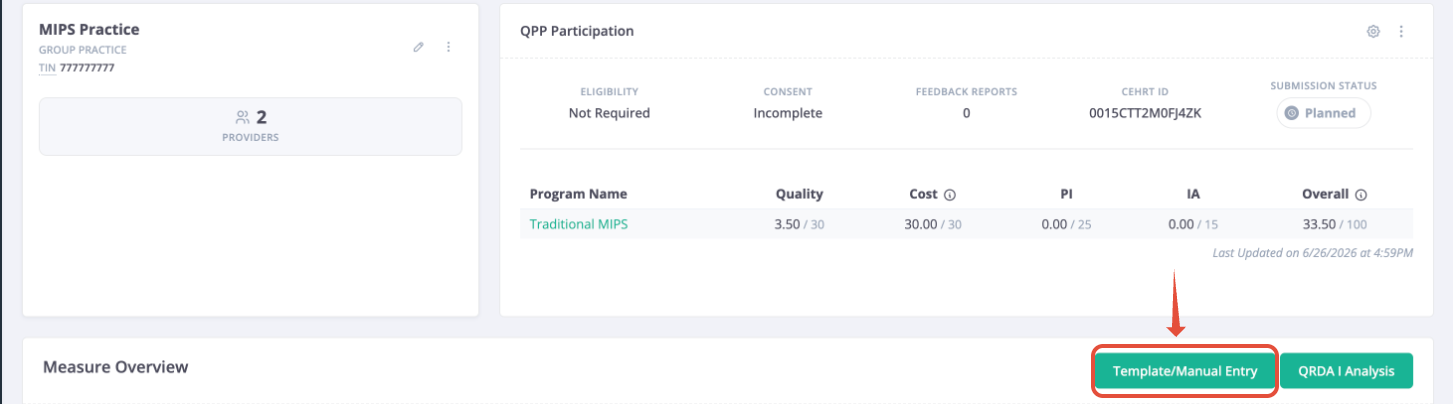
- Click on the "Template/Manual Entry" button in the Measure Overview pane.
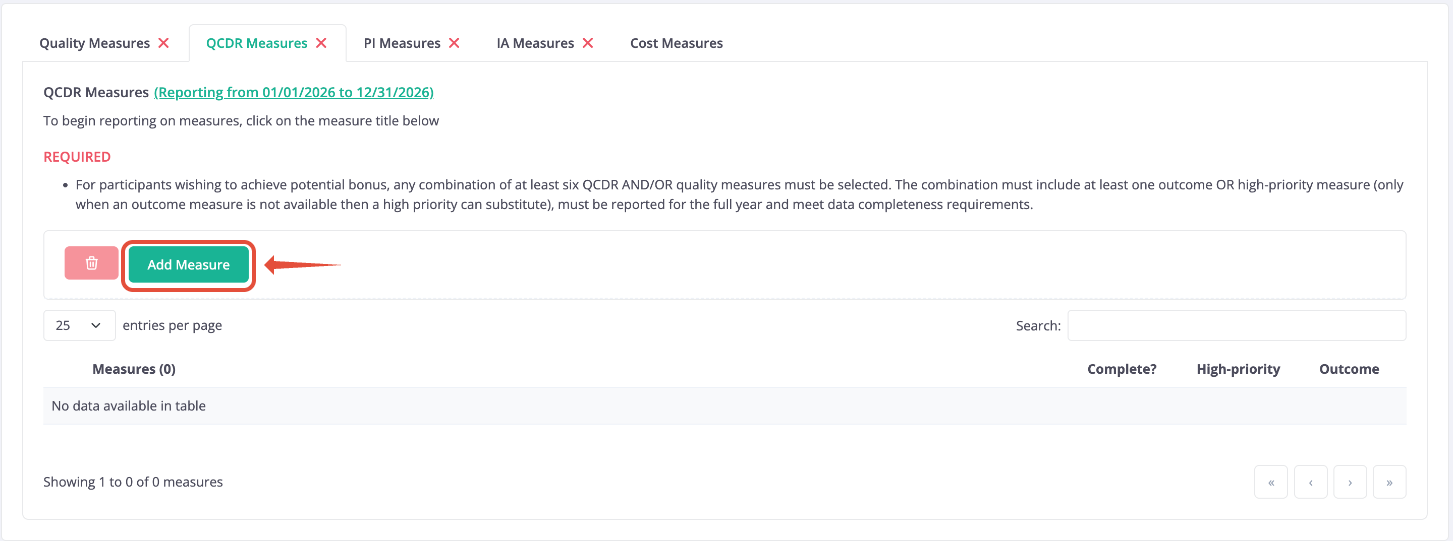
- Click the Add Measure button. If you are intending to use QCDR measures, ensure that you are on the QCDR measure tab.
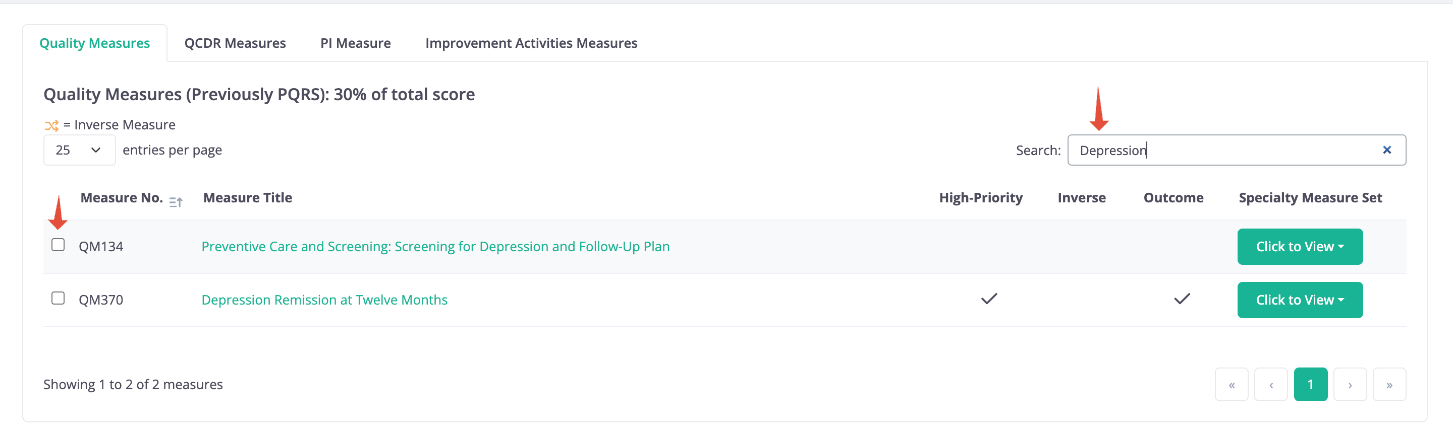
- Use the search bar to find desired measures. Check off each measure that you wish to report.
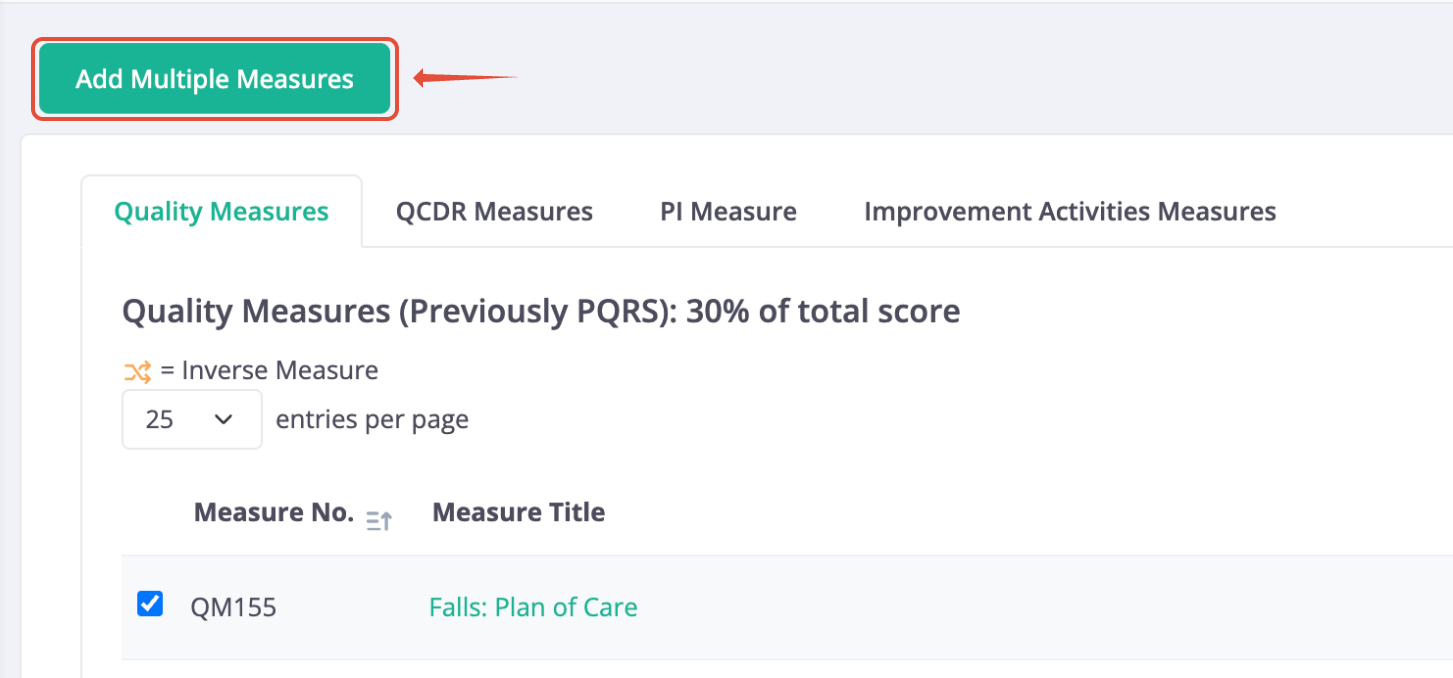
- Once all measures have been checked off, click the Add Multiple Measures button.


Uploading Files (First Upload)
Use the following instructions on how to add XLSX Template CQMs via Drag & Drop.
- If you submit data for more than one Clinic, choose the Clinic name from the Clinic Name drop-down in the Heading Bar.
- Select the desired reporting year from the Reporting Year drop-down in the Heading Bar
- In the left Navigation Bar, group practices will need to select Group Practices > Group Practices then click on the group practice name in green. Individual providers will select Providers > Providers then click on the provider's name in green.
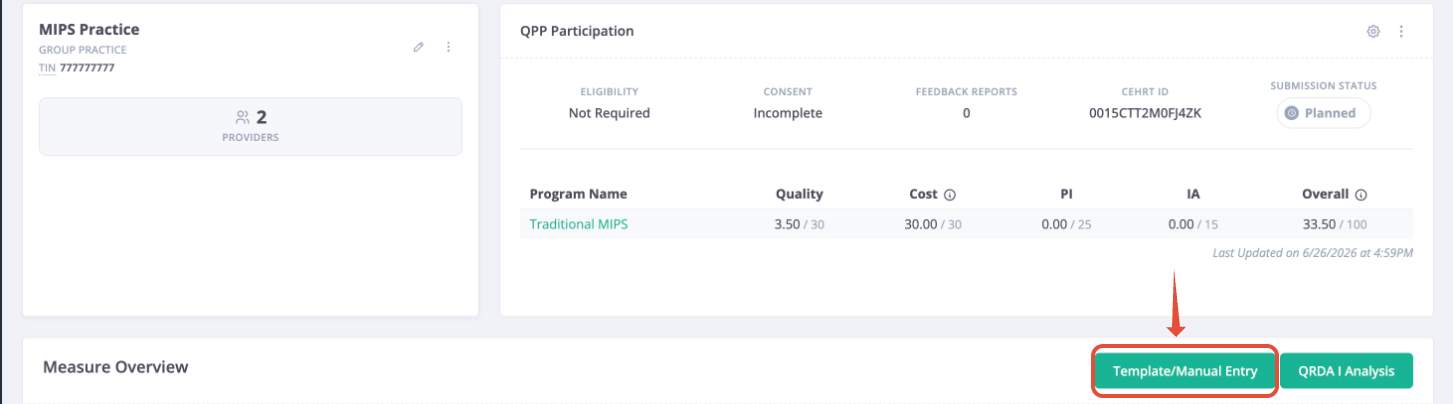
- Click on the "Template/Manual Entry" button in the Measure Overview pane.
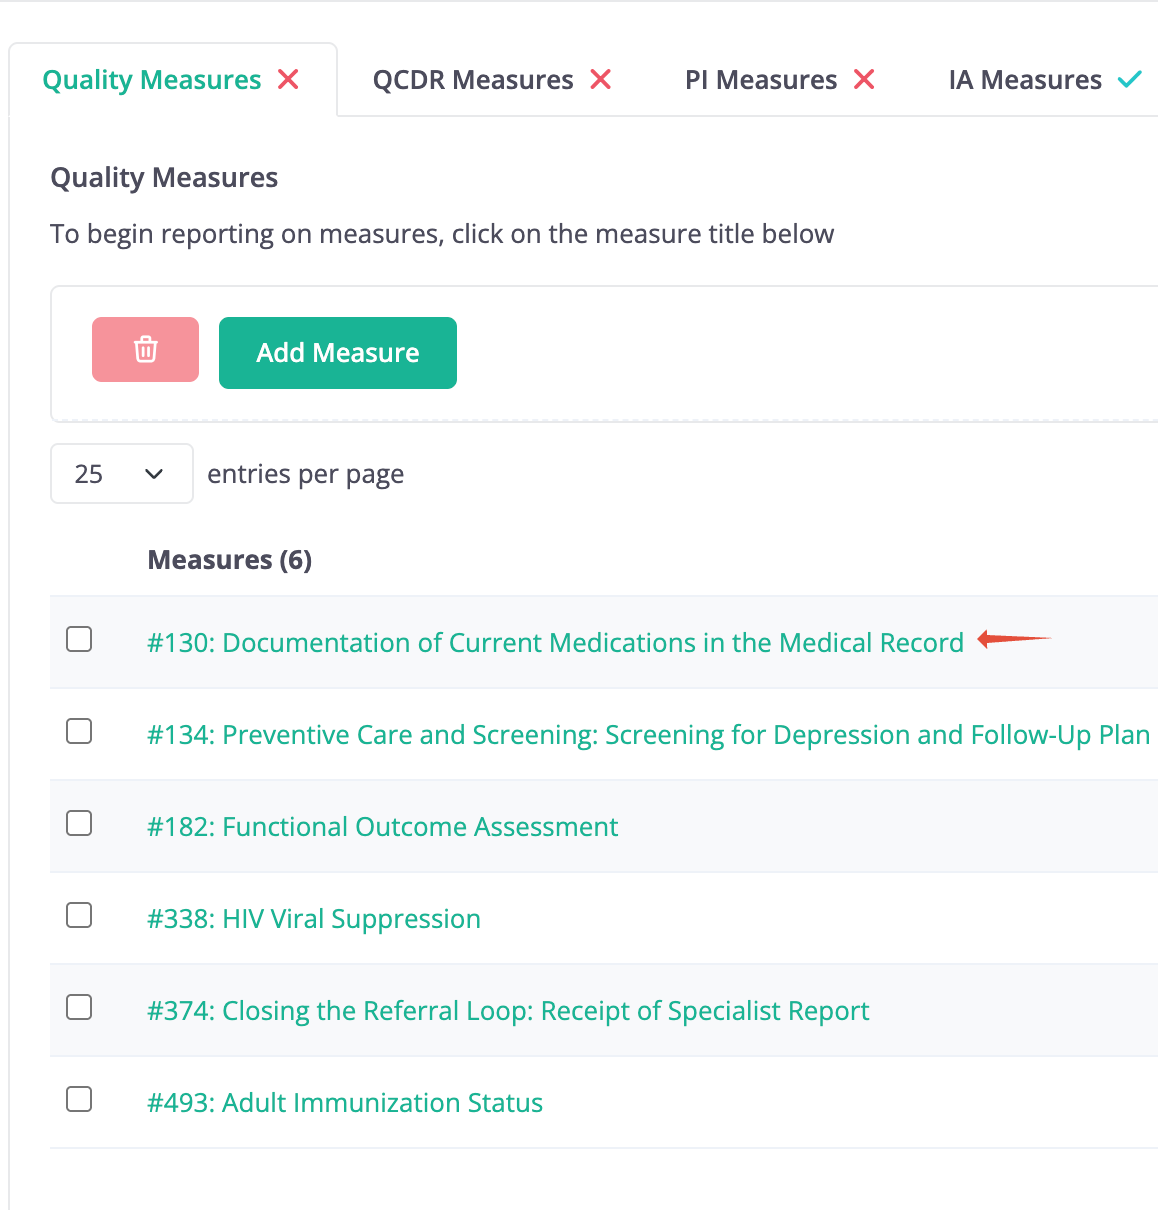
- Click on the quality measure you want to import data for.
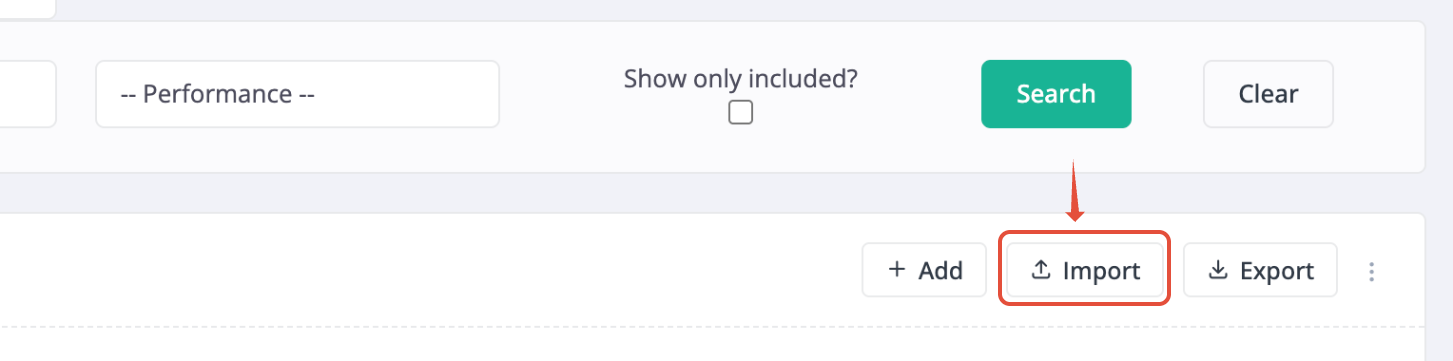
- Click on the Import Encounters button in the Performance Detail pane.
- Follow the on-screen instructions to upload your file. Files may be uploaded via drag and drop or by clicking on the Choose File button.
Monitoring Upload
Use the following instructions to monitor newly uploaded files and ensure all files were imported correctly.
- Click on Imports > Templates > History in the left Navigation Bar to view the Imports History screen.
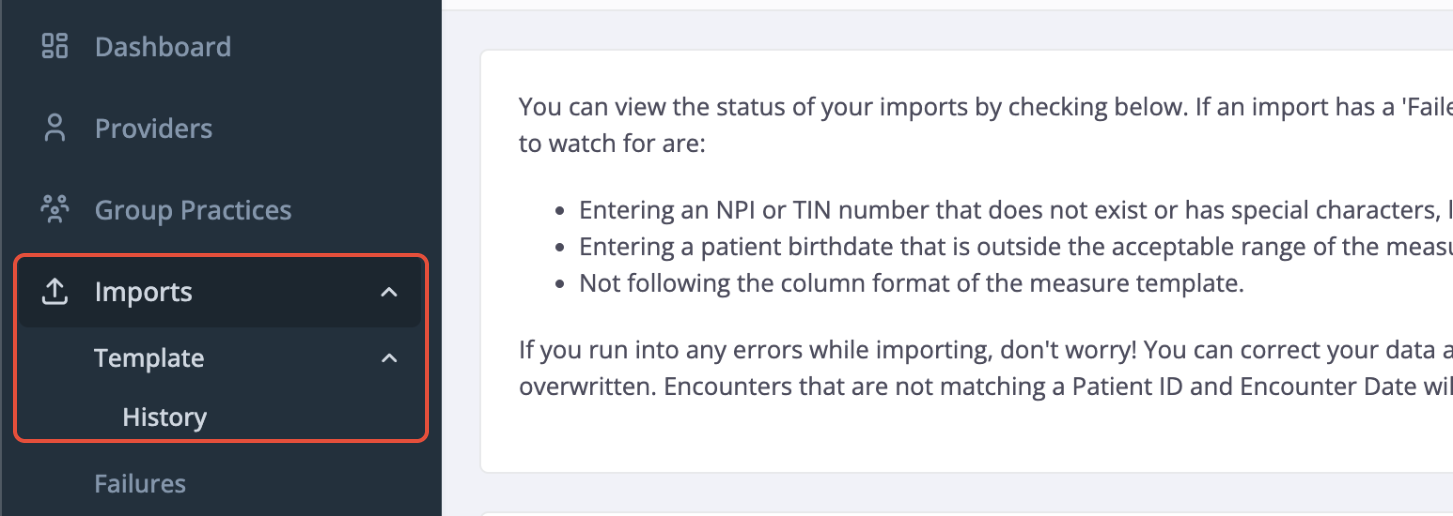
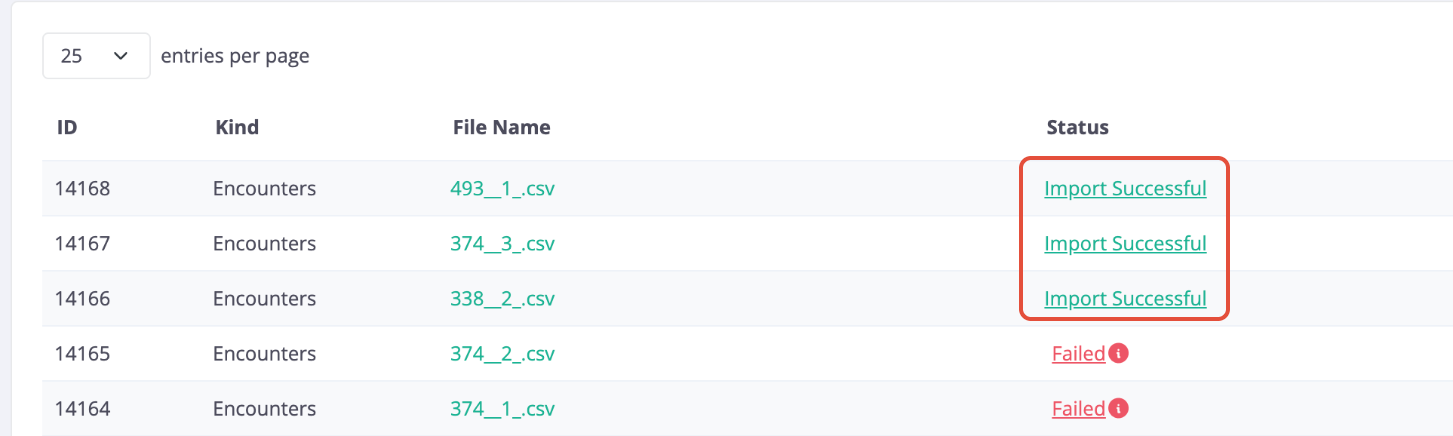
- Ensure that Status reads Import Successful for each file.
- Click the Status in green for each newly uploaded file (e.g., Import Successful ) to ensure the files were imported successfully.
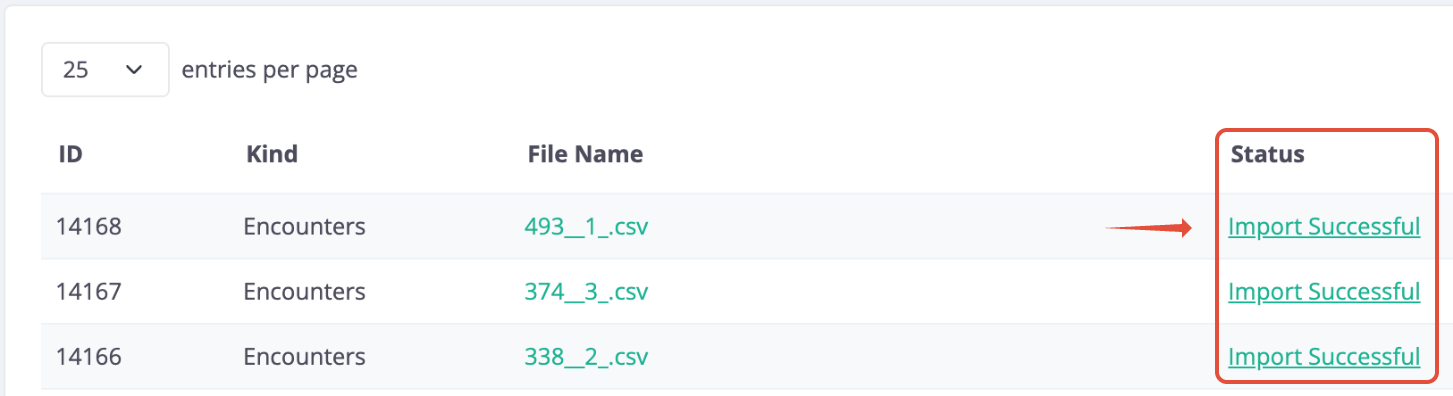
- For any errors listed, see the next section on Remediating Issues with Uploaded Files.
Reviewing and Remediating Issues with Uploaded Files
Use the Import History to view recently imported and failed rows in uploaded XLSX template files. Be sure to correct the corresponding issues and re-upload the corrections. The corrections may include just the fixed rows or may be the entire original file with the corrected rows.
Import Failures can be accessed via left navigation menu by selecting Imports > Templates > History.
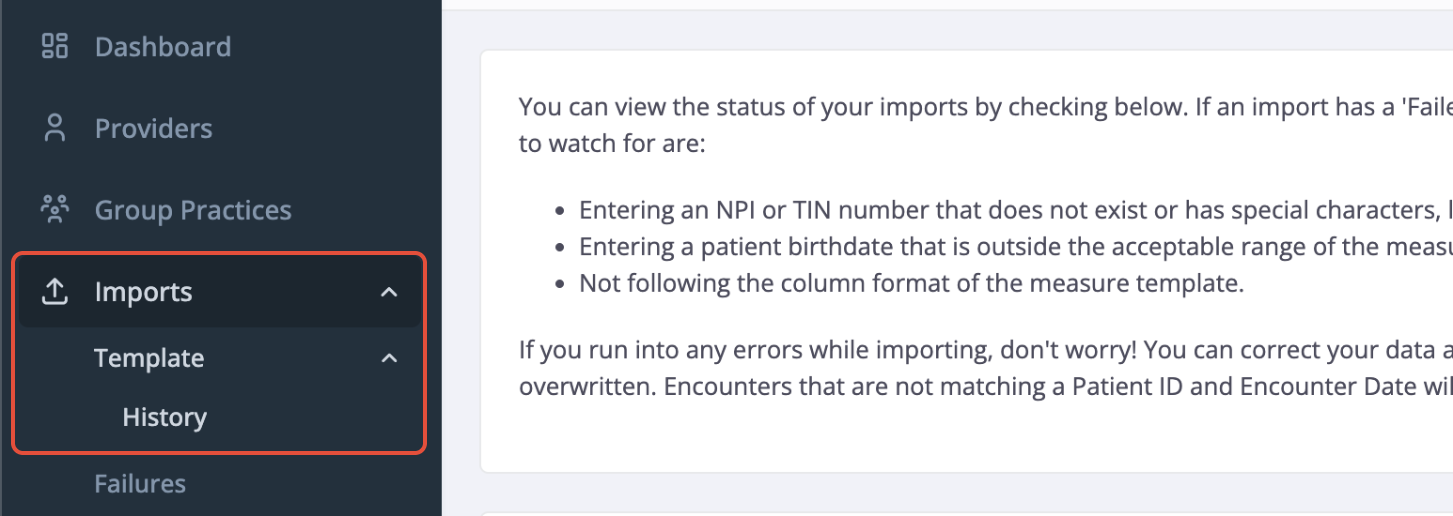
Click on the status of the file to review more detailed information about the import.
For a file with a status of 'Import Successful', there may be rows that failed. Click on Import Successful to review which rows have failed. Correct the row according to the failure reason and re-upload.
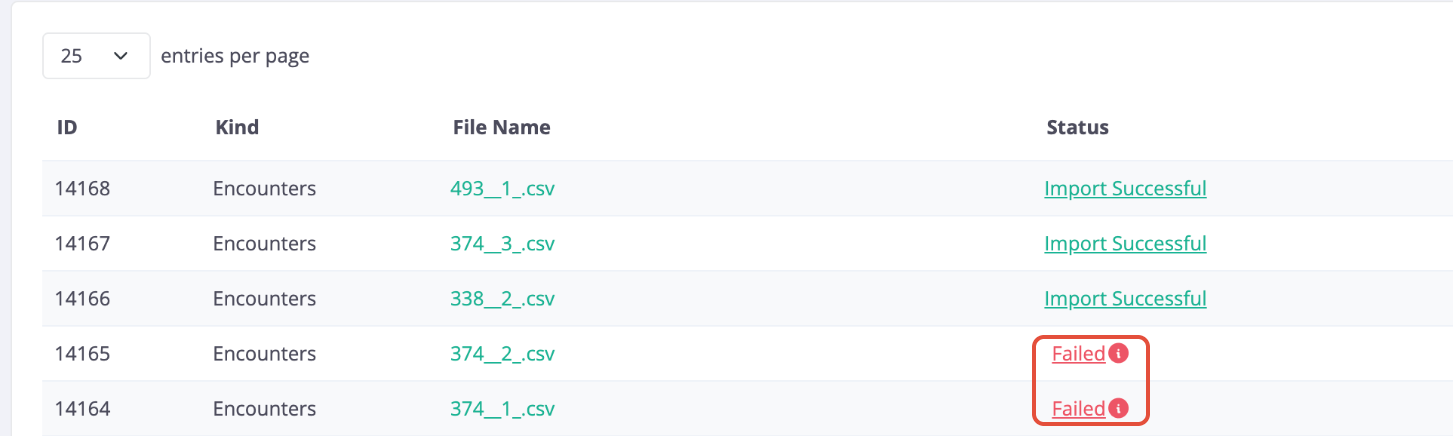
For a file with a status of 'Failed', no rows were successful. Each failure record indicates the failure reason and the row that failed. Find the failed row in your file, correct the row according to the failure reason and re-upload.
Uploading Files (Subsequent Uploads)
Use the following instructions on how to add XLSX Template CQMs via Drag & Drop after your first upload for the measure has been completed.
- If you submit data for more than one Clinic, choose the Clinic name from the Clinic Name drop-down in the Heading Bar.
- Select the desired reporting year from the Reporting Year drop-down in the Heading Bar
- In the left Navigation Bar, group practices will need to select Group Practices > Group Practices then click on the group practice name in blue. Individual providers will select Providers > Providers then click on the provider's name in green.
- Click on the measure name in the Measure Overview pane.
- Click on the 'Import Encounters' option.
- Add your completed template following the instructions on the screen.