TABLE OF CONTENTS
Overview
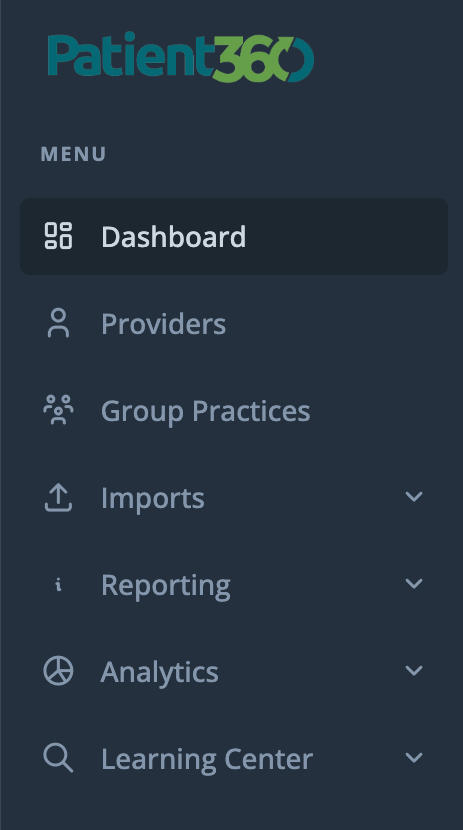
The goal of this article is to provide details on the tools available in the Patient360 portal for ACO Users. These key tools include the Dashboard, Group Practices and Imports.
Patient360 Support Tickets
Users can open and track Patient360 support tickets directly through the portal.
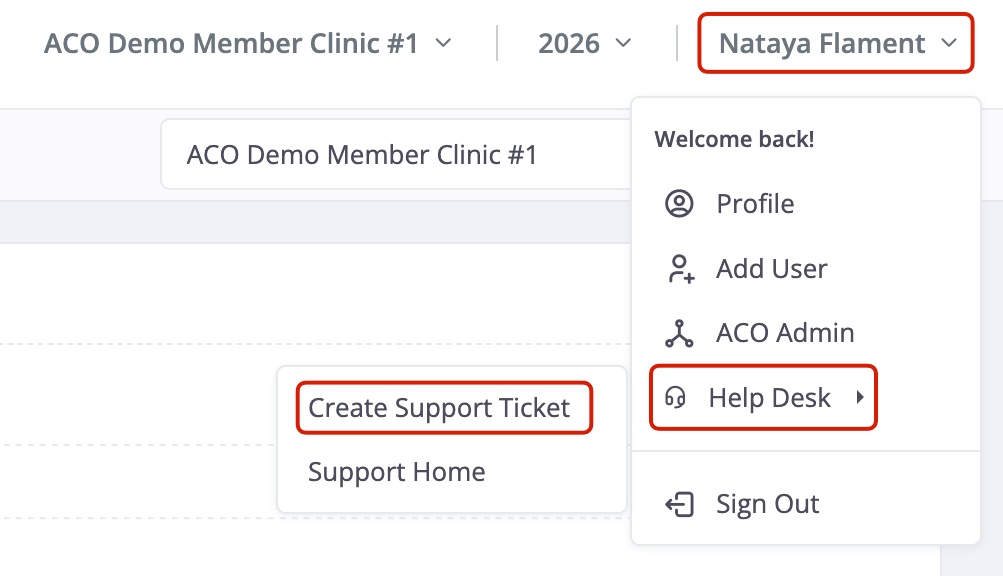
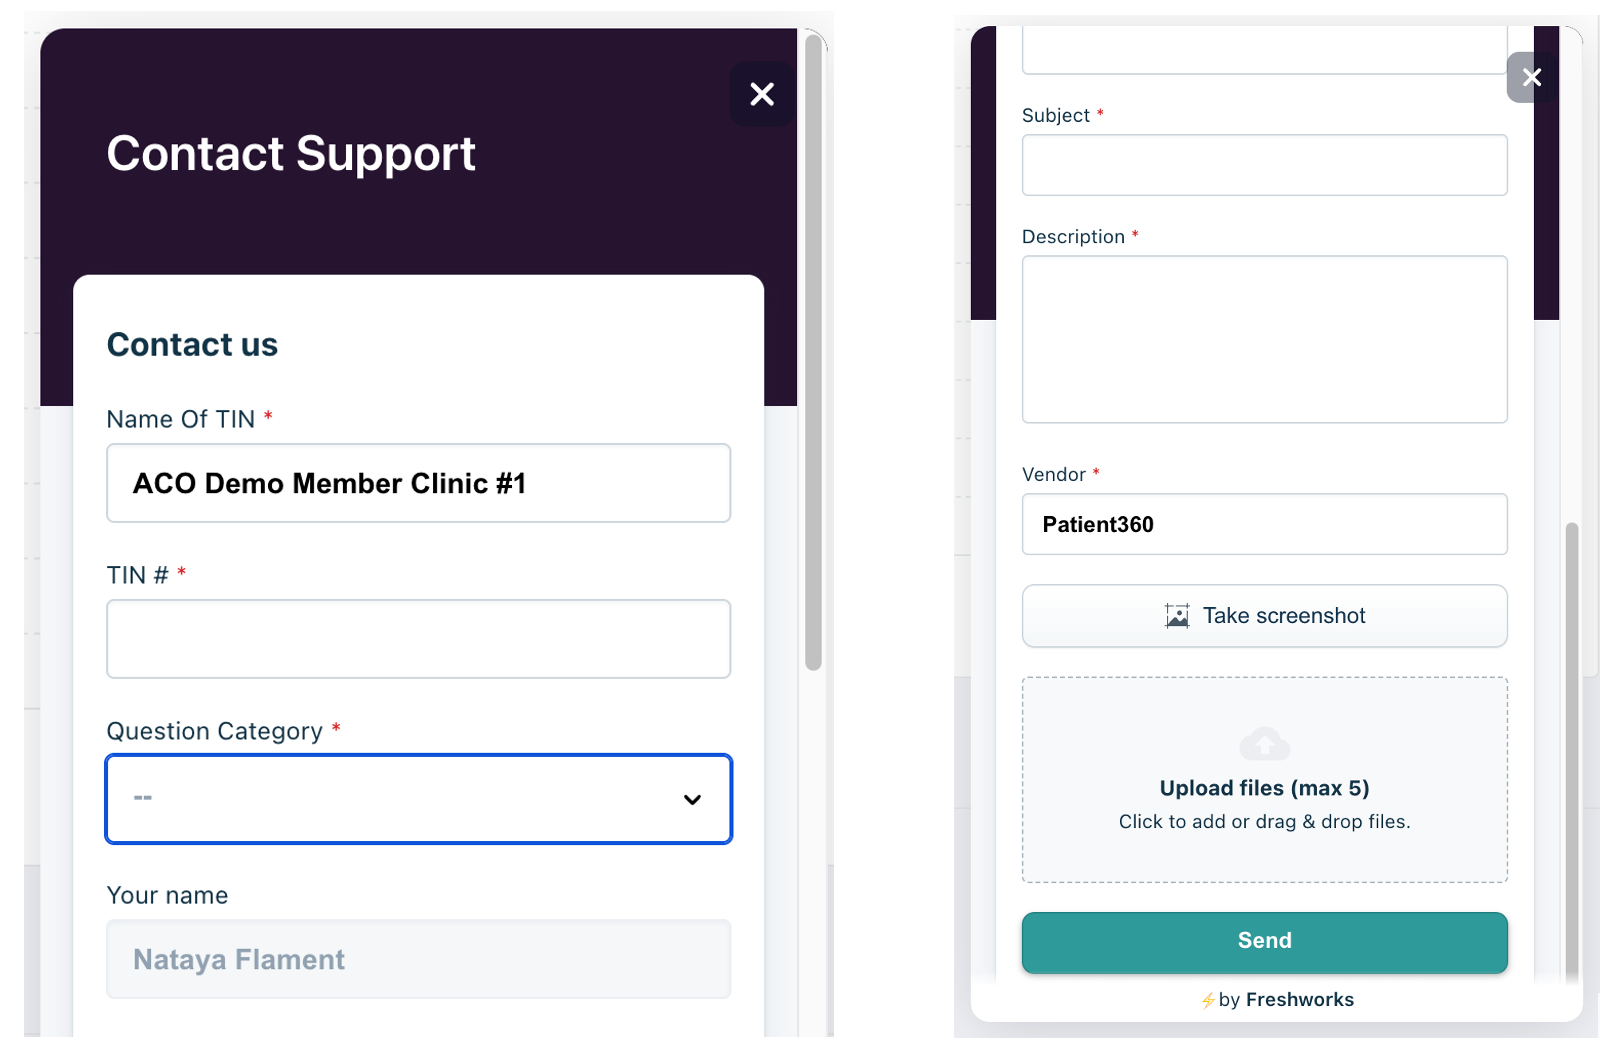
To open a support ticket, click on the user name in the top right corner of the portal. Click "Help Desk" then "Create Support Ticket". This will launch a support ticket pop-up, please ensure that all required fields are filled out.
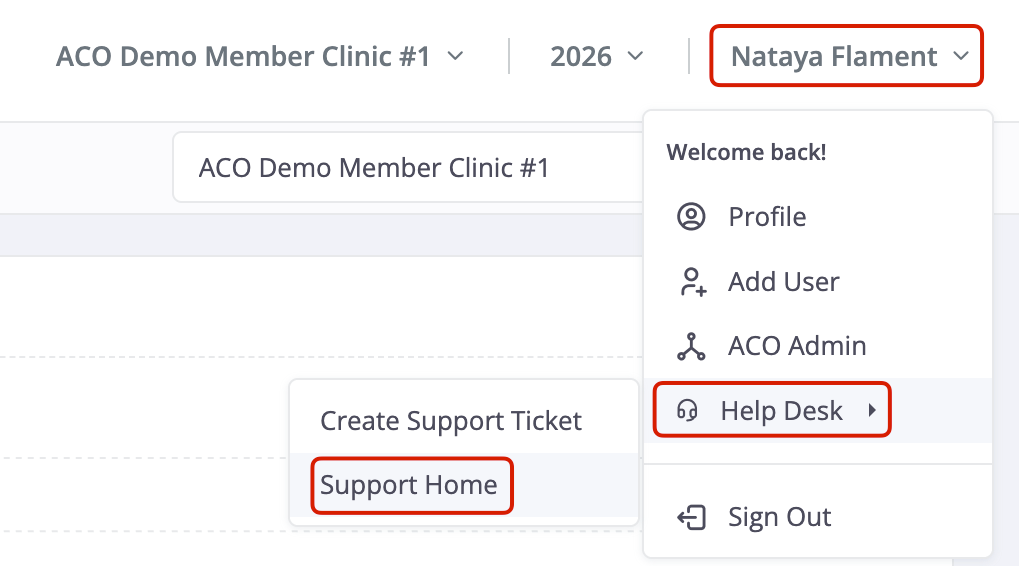
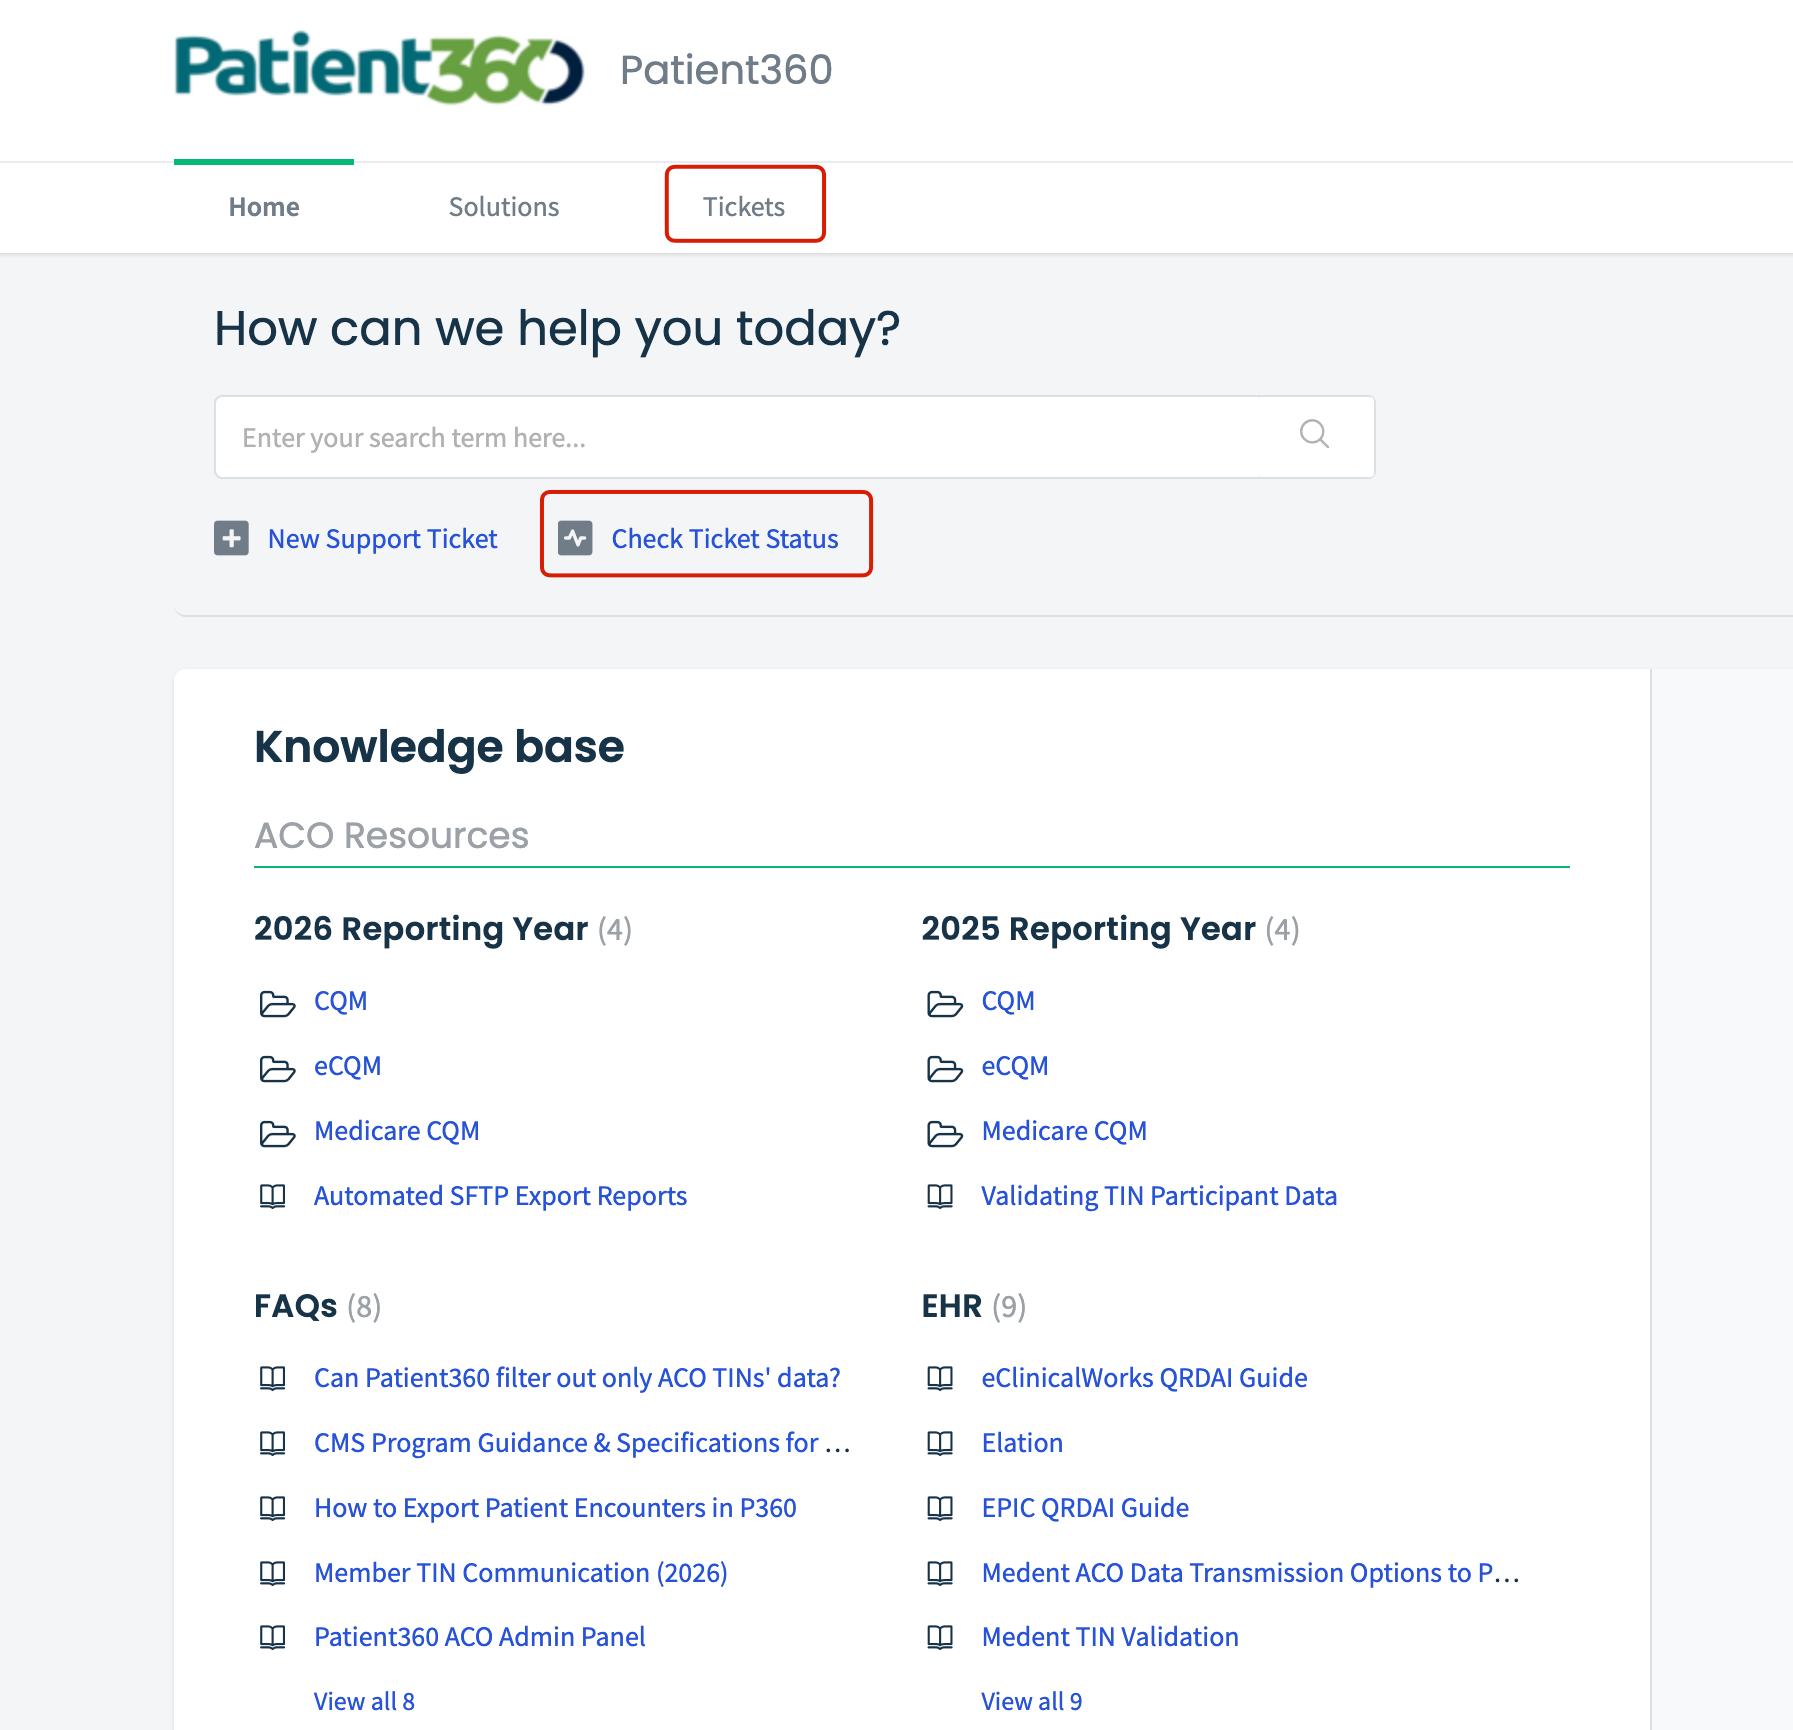
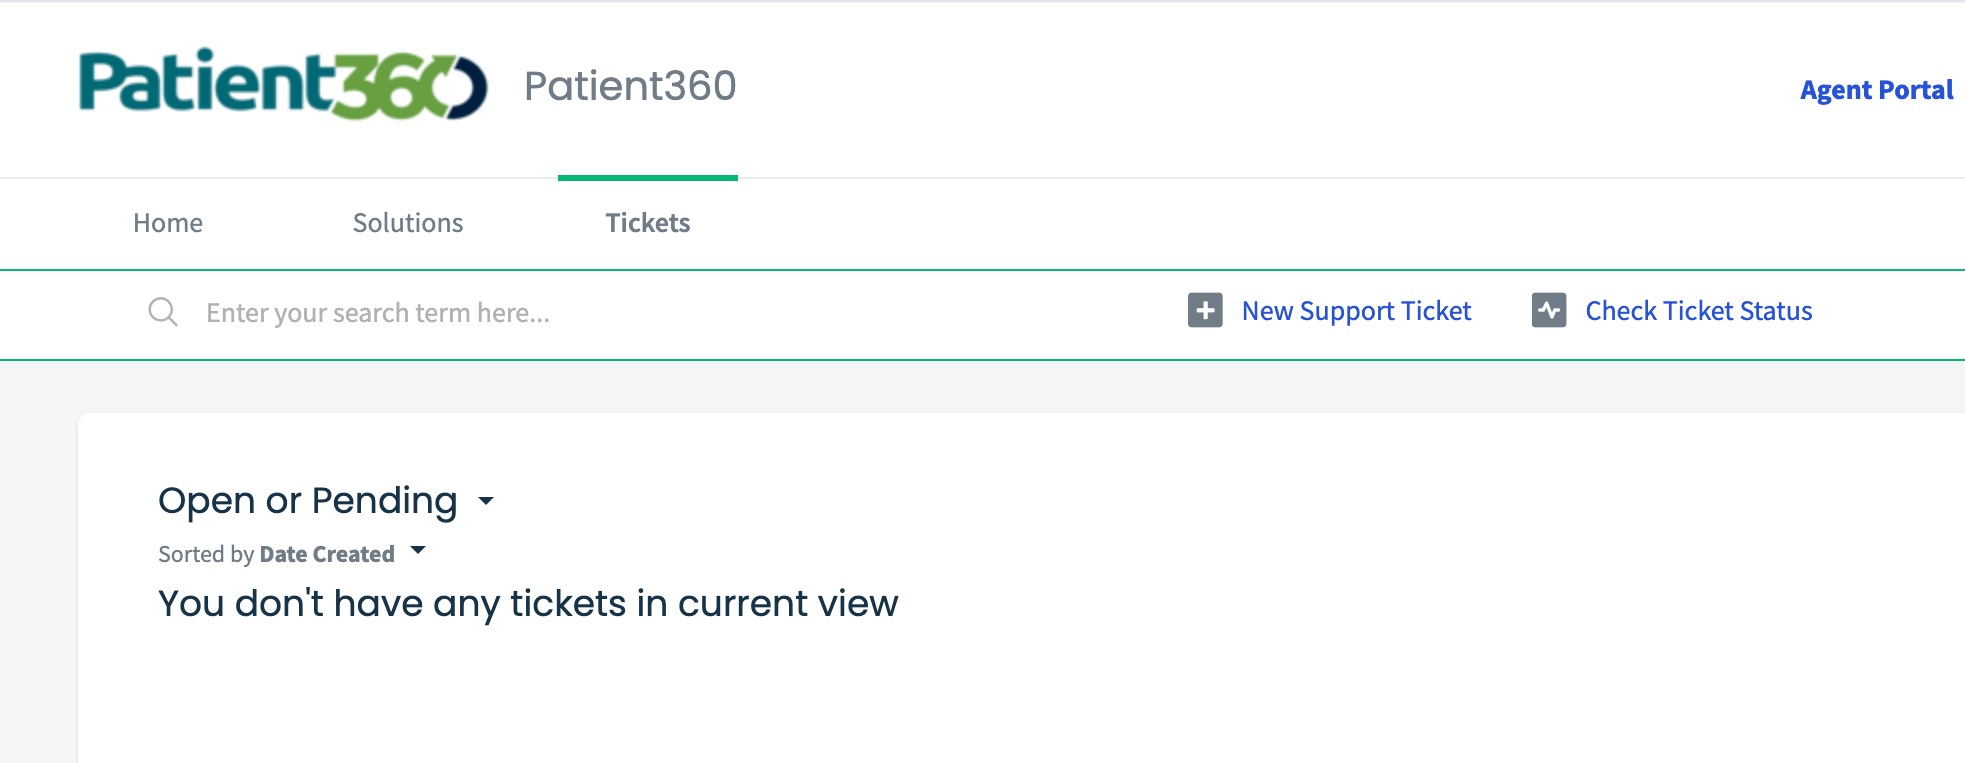
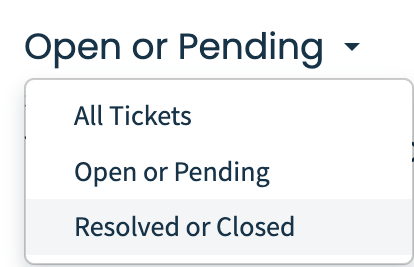
To view open and pending support tickets, click on the user name in the top right corner of the portal, click "Help Desk" and then click "Support Home". This will take you to the home page of our Patient360 knowledge base where you will find additional helpful resources like this one! Click on "Tickets" or "Check Ticket Status" to see all open and pending tickets. Click the drop down arrow to see other statues like all or resolved/closed tickets.
Dashboard
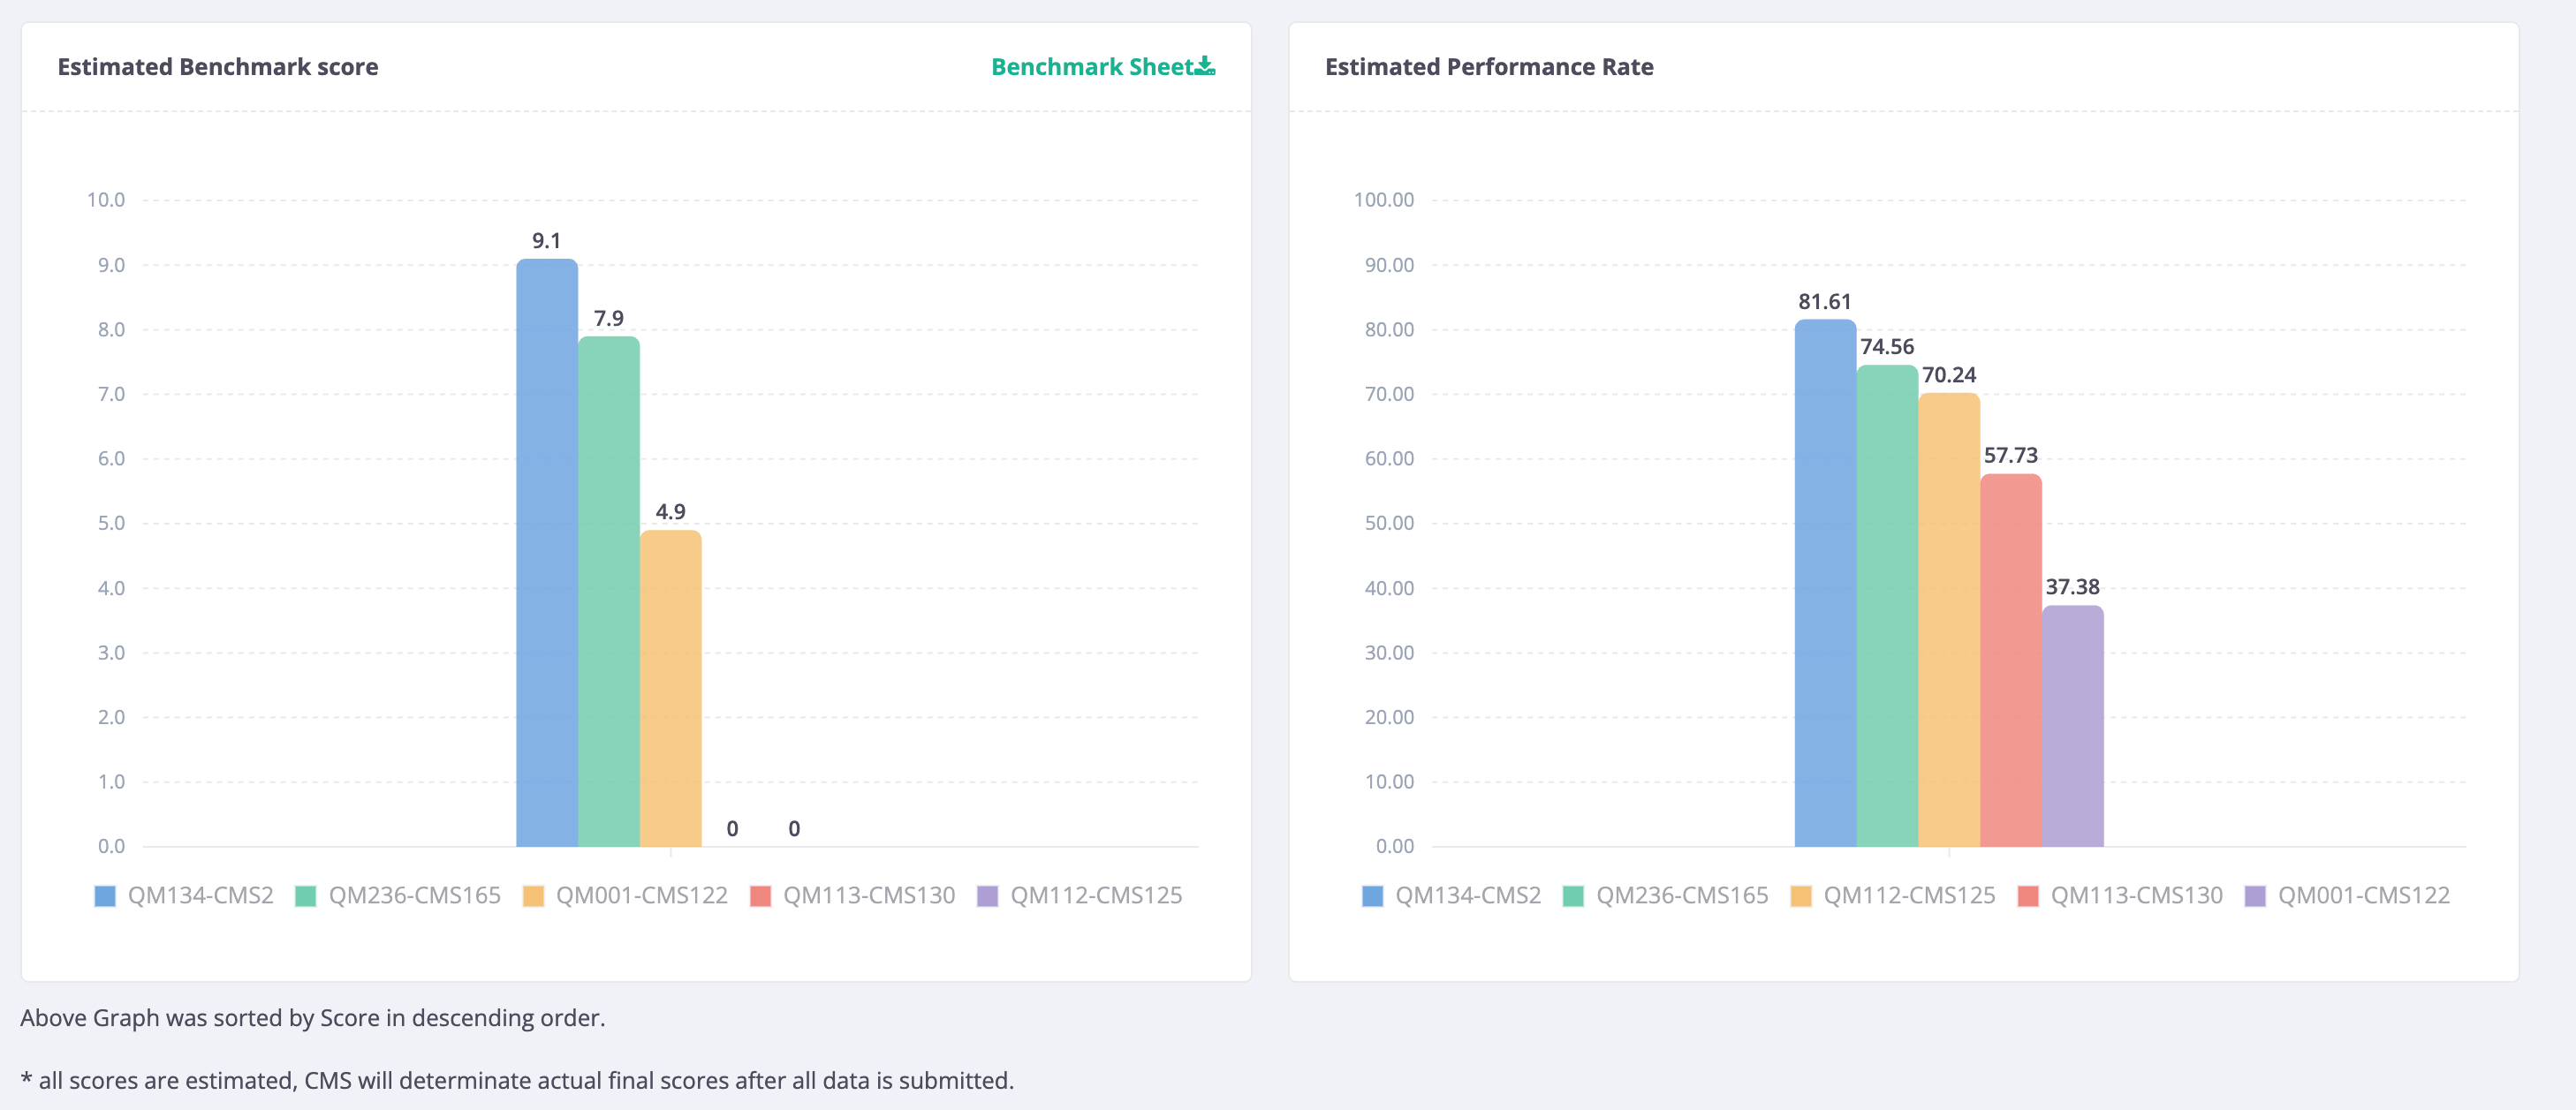
The Dashboard shows two graphs that detail the estimated benchmark score (out of 10 points) and the estimated performance rate (out of 100%) for the 5 APP+ quality measures.
Dashboard Tips:
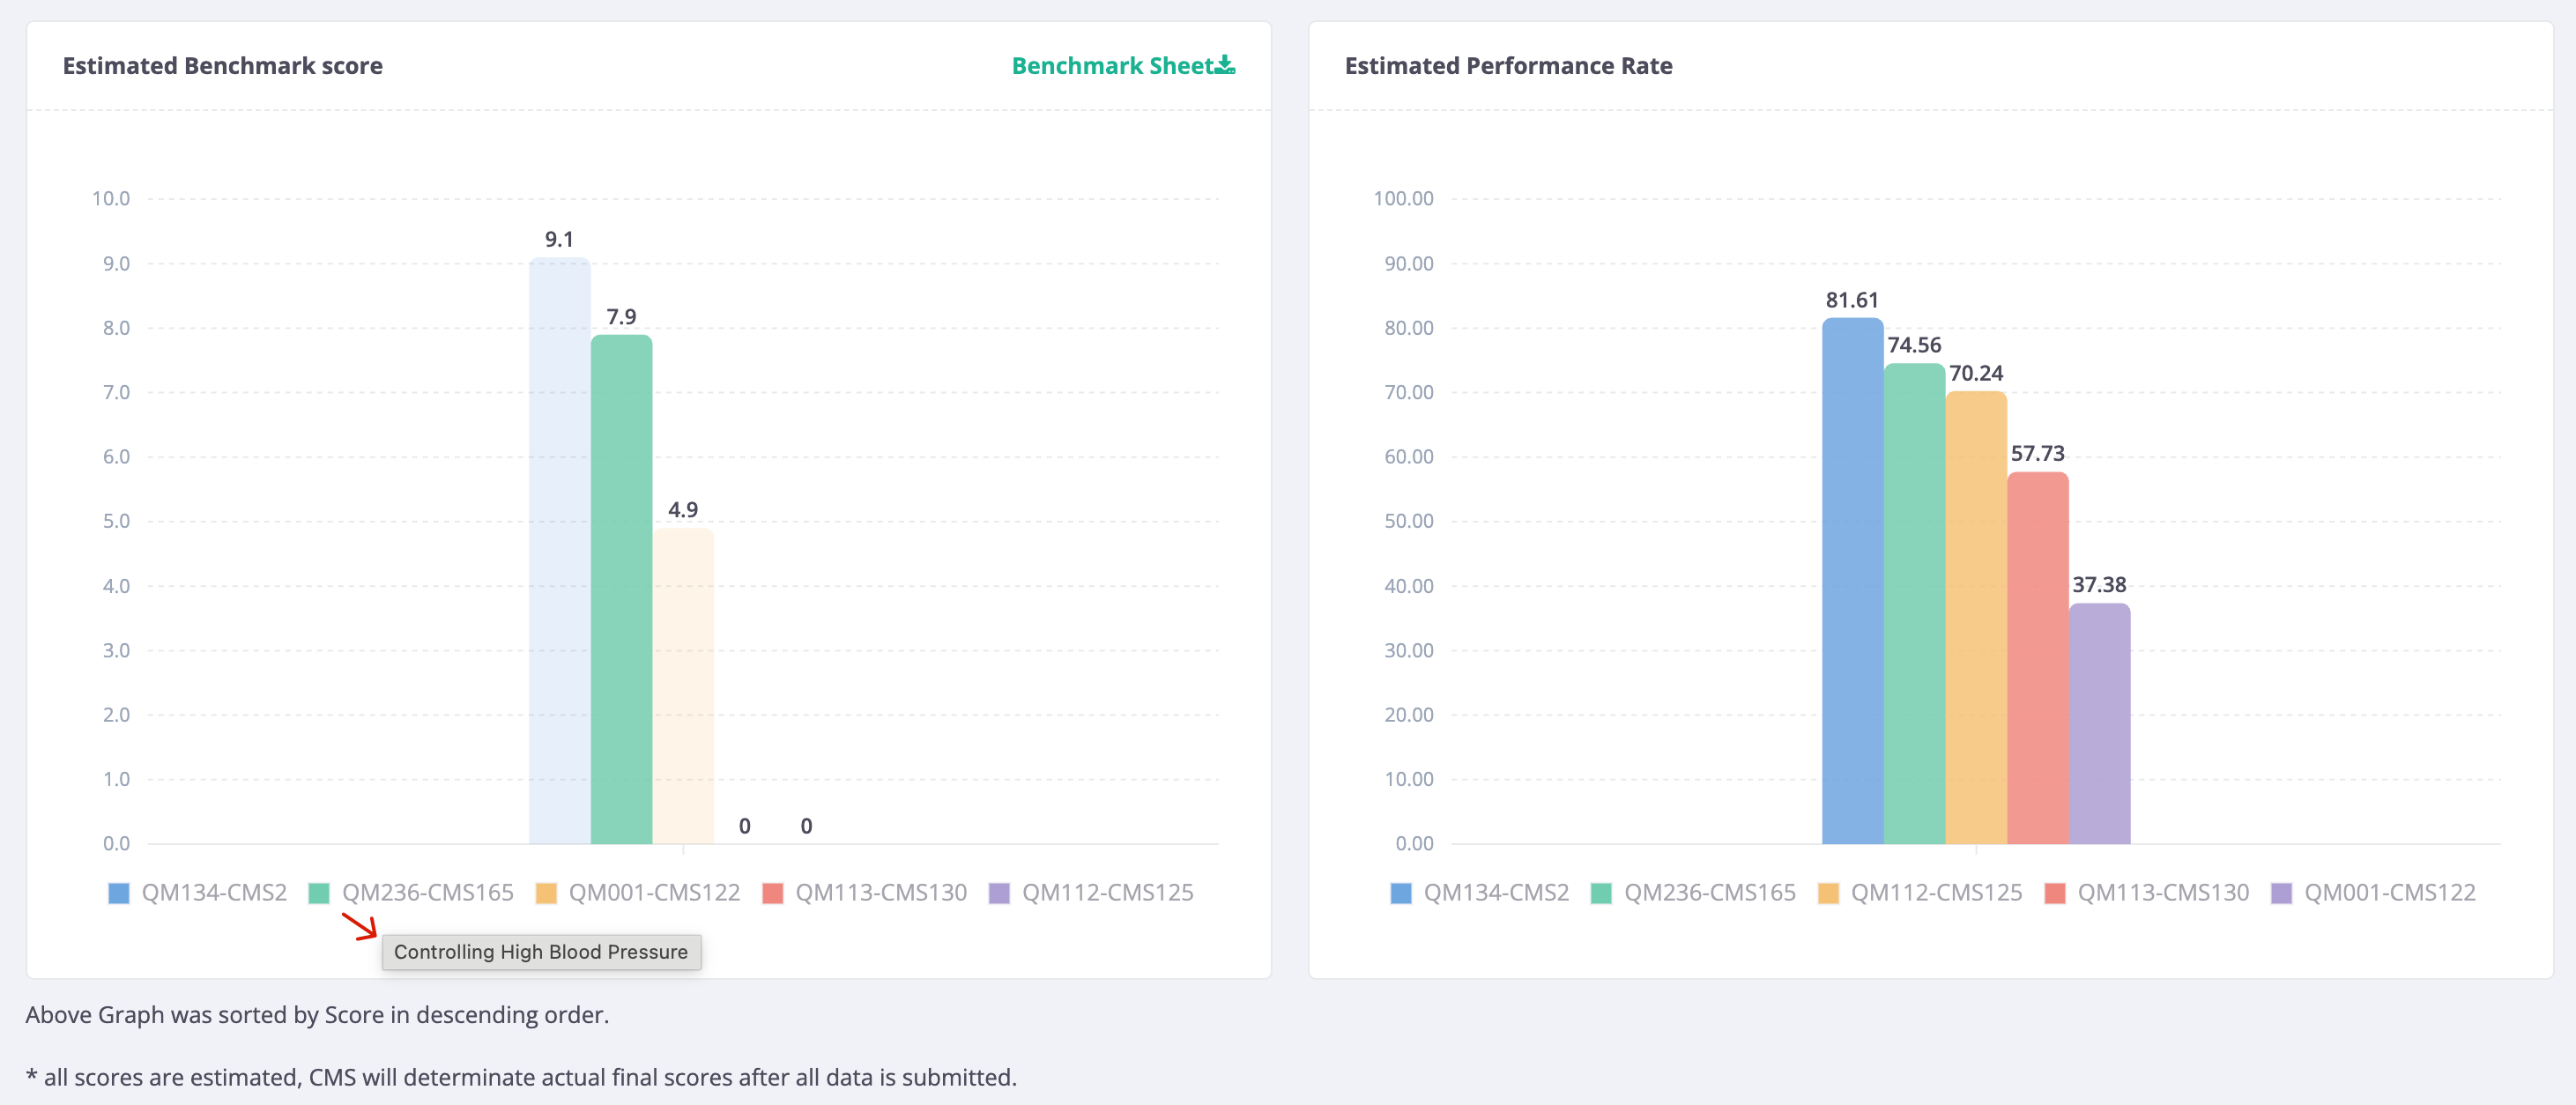
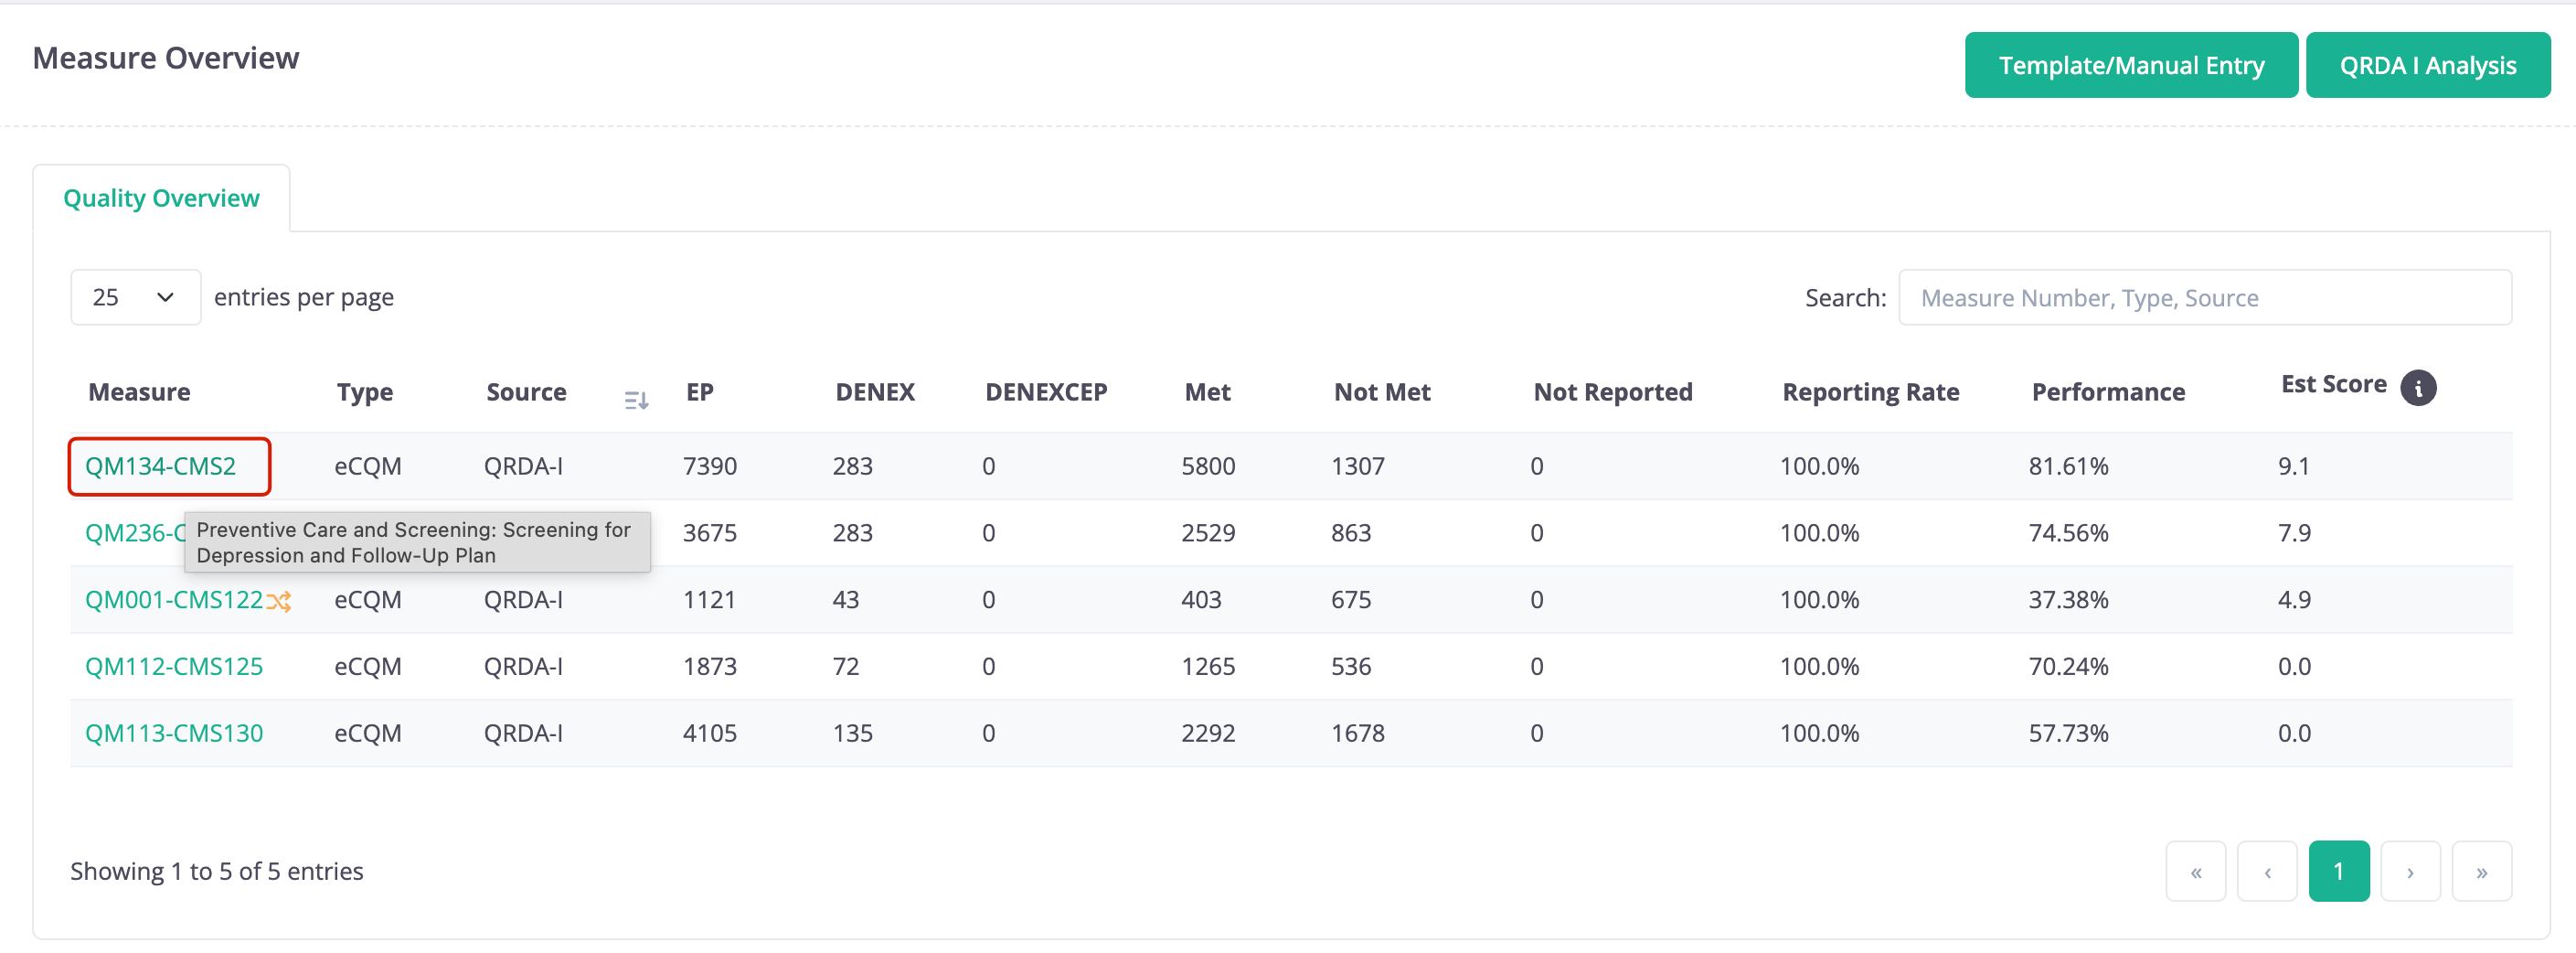
- Hover over each measure number to see the measure name
- The graphs are organized from highest to lowest benchmark score/performance rate
- To isolate a specific measure(s), click on the measure number(s) you want to hide
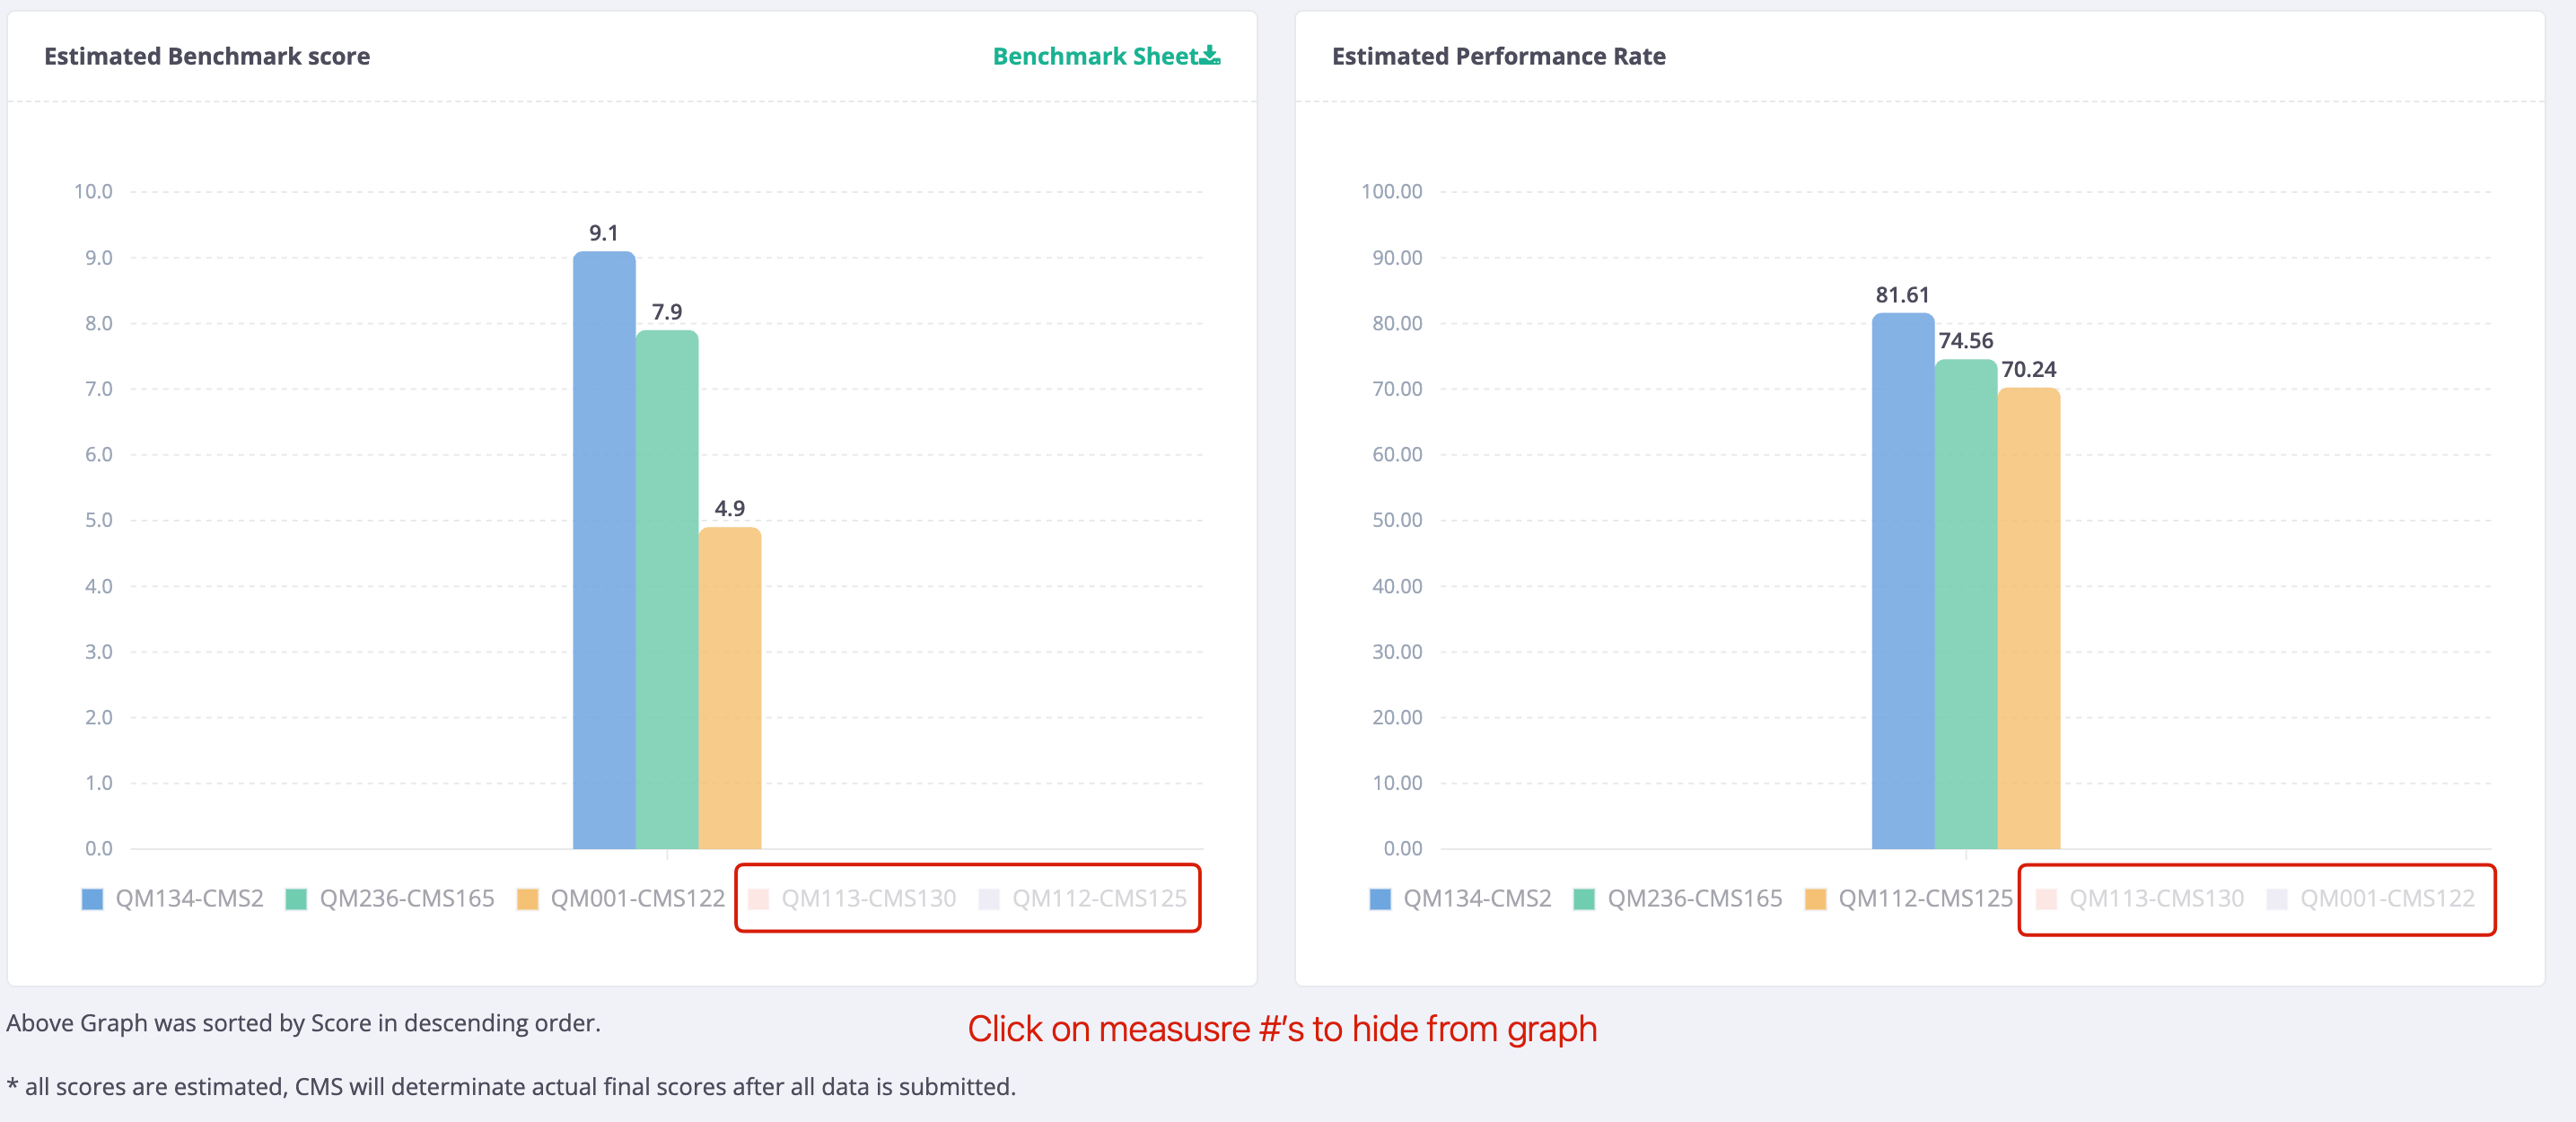
Note - Measure 112 (CMS 125): Breast Cancer Screening and Measure 113 (CMS 130): Colorectal Cancer Screening do not have benchmarks for the 2026 performance period due to "Insufficient volume of data submitted in PY 2024 to establish a historical benchmark."
Additionally, it is important to note that Measure 1 (CMS 122): Diabetes: Glycemic Status Assessment Greater Than 9% is an inverse measure, a performance rate closer to 0% is ideal and will result in a higher estimated benchmark score.
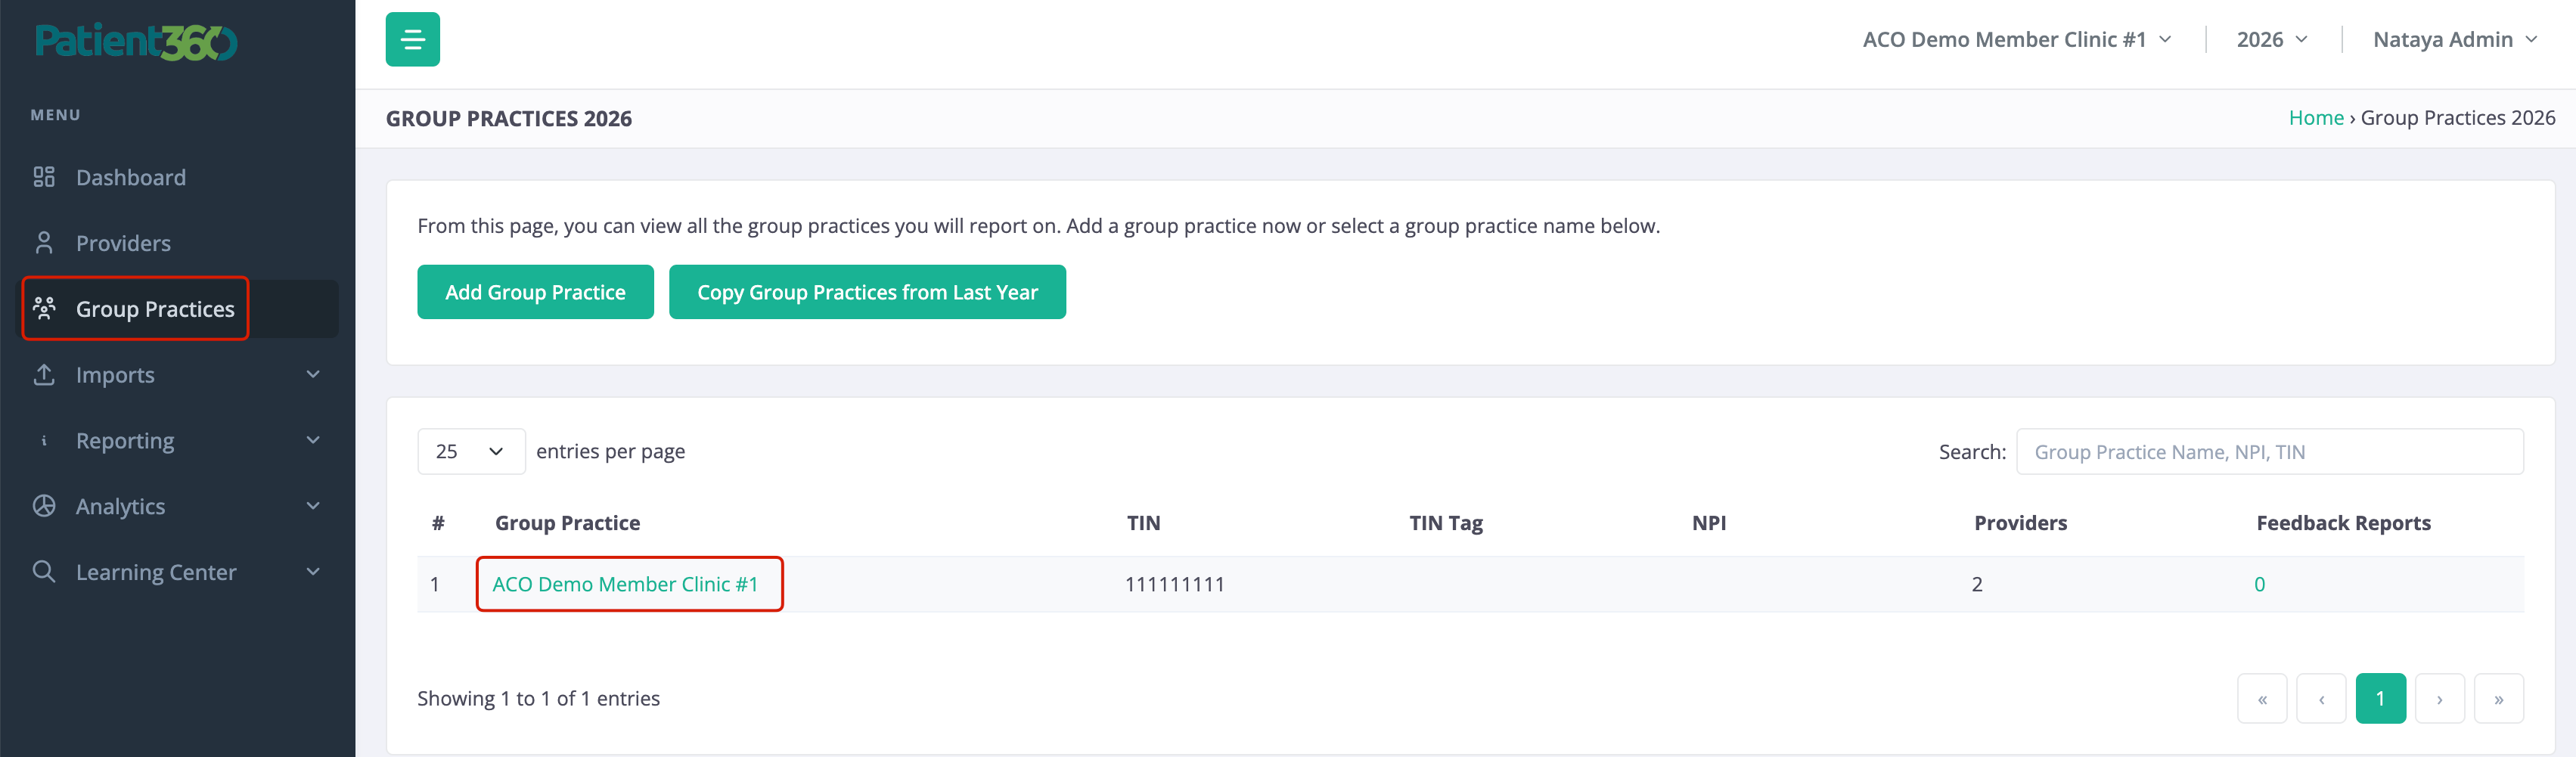
Group Practices
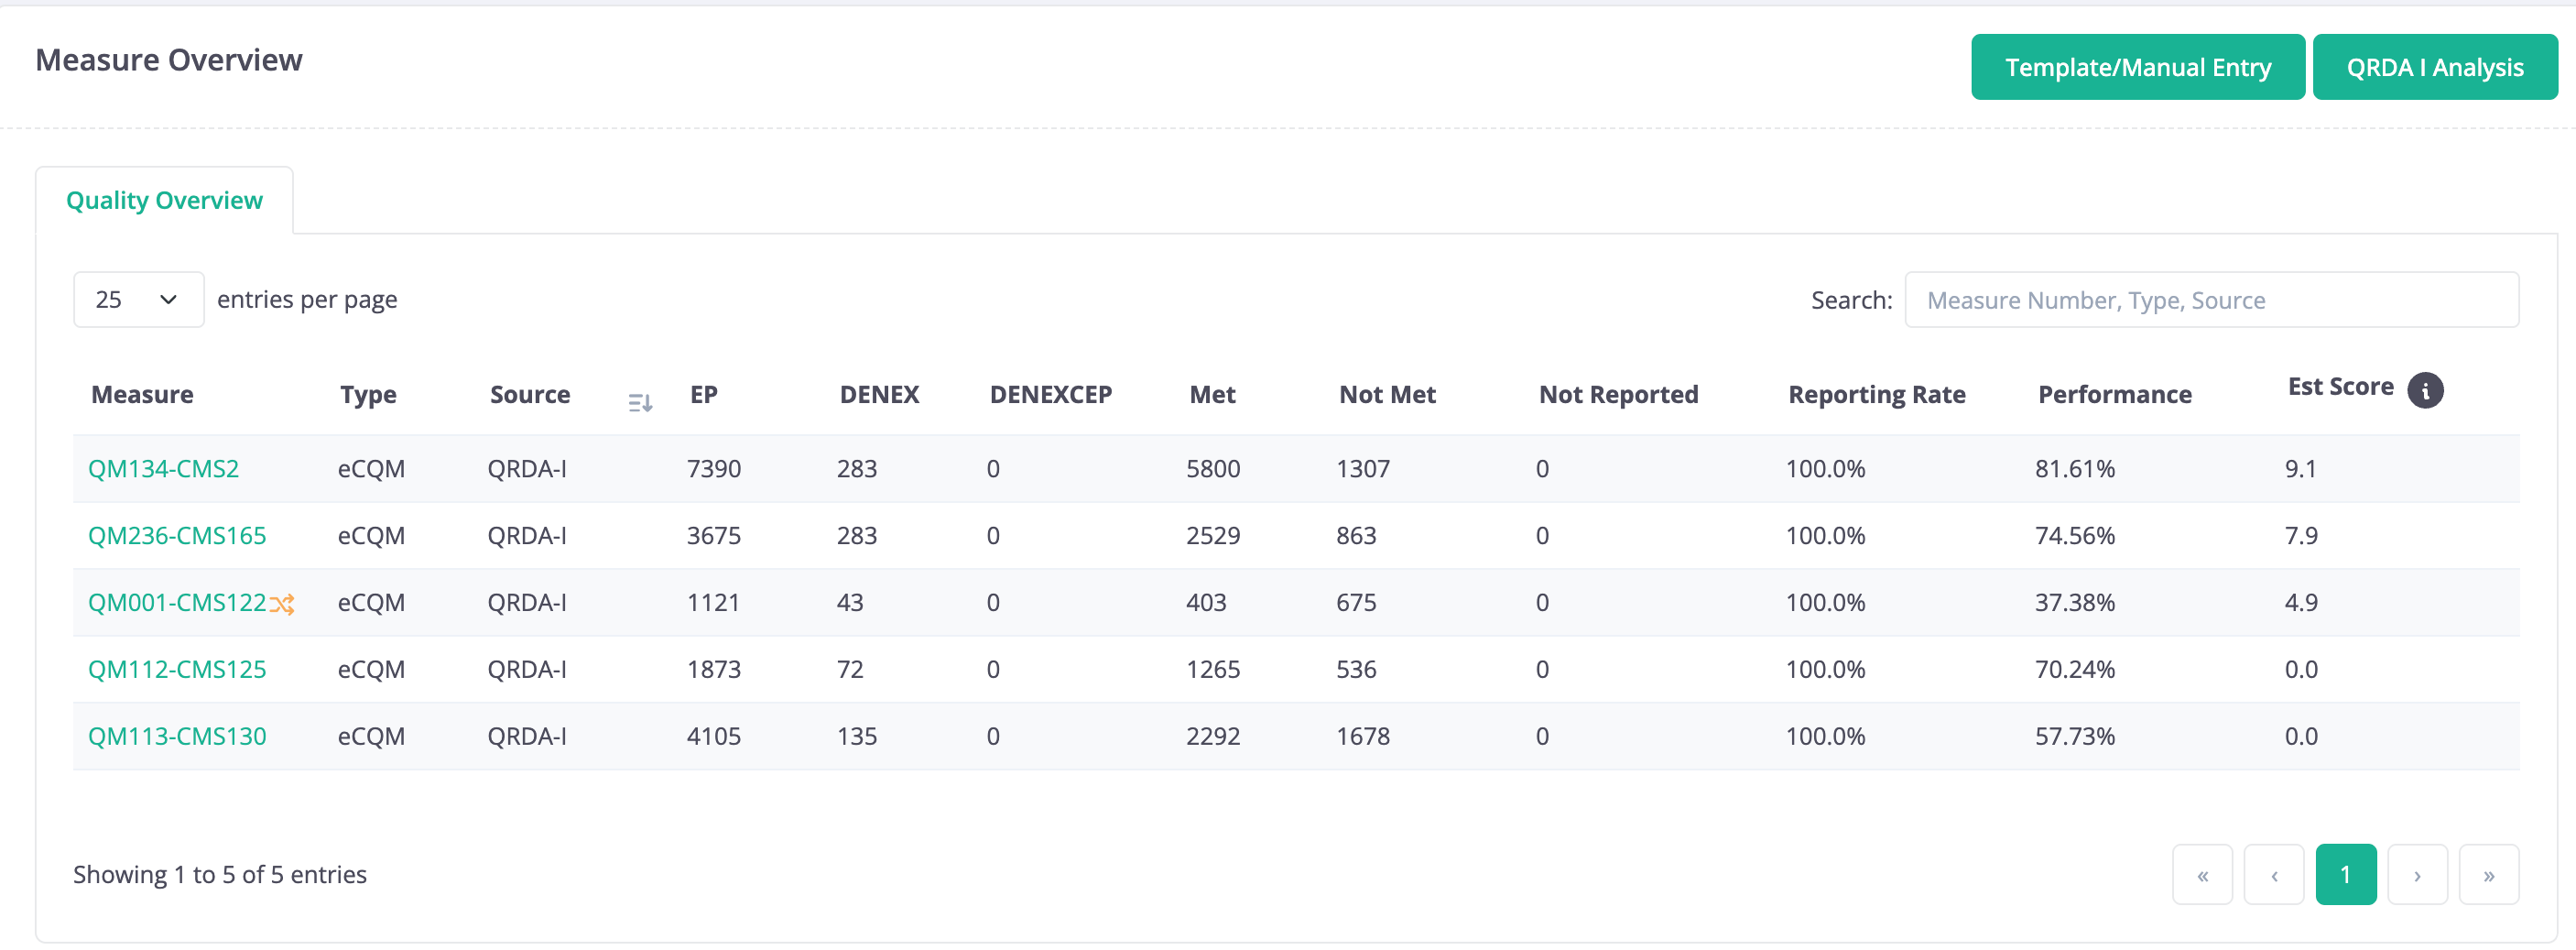
Under Group Practices, the user will have access to the Measure Overview which provides a detailed view of each measure, including: Measure number, Measure type, Source, Eligible population, Denominator exclusions/exceptions, Met, Not Met, Not Reported, Reporting Rate, Performance, and Estimated Score.
Reminder: Measure 112 (CMS 125): Breast Cancer Screening and Measure 113 (CMS 130): Colorectal Cancer Screening do not have benchmarks for the 2026 performance period.
Exporting Patient Level Data
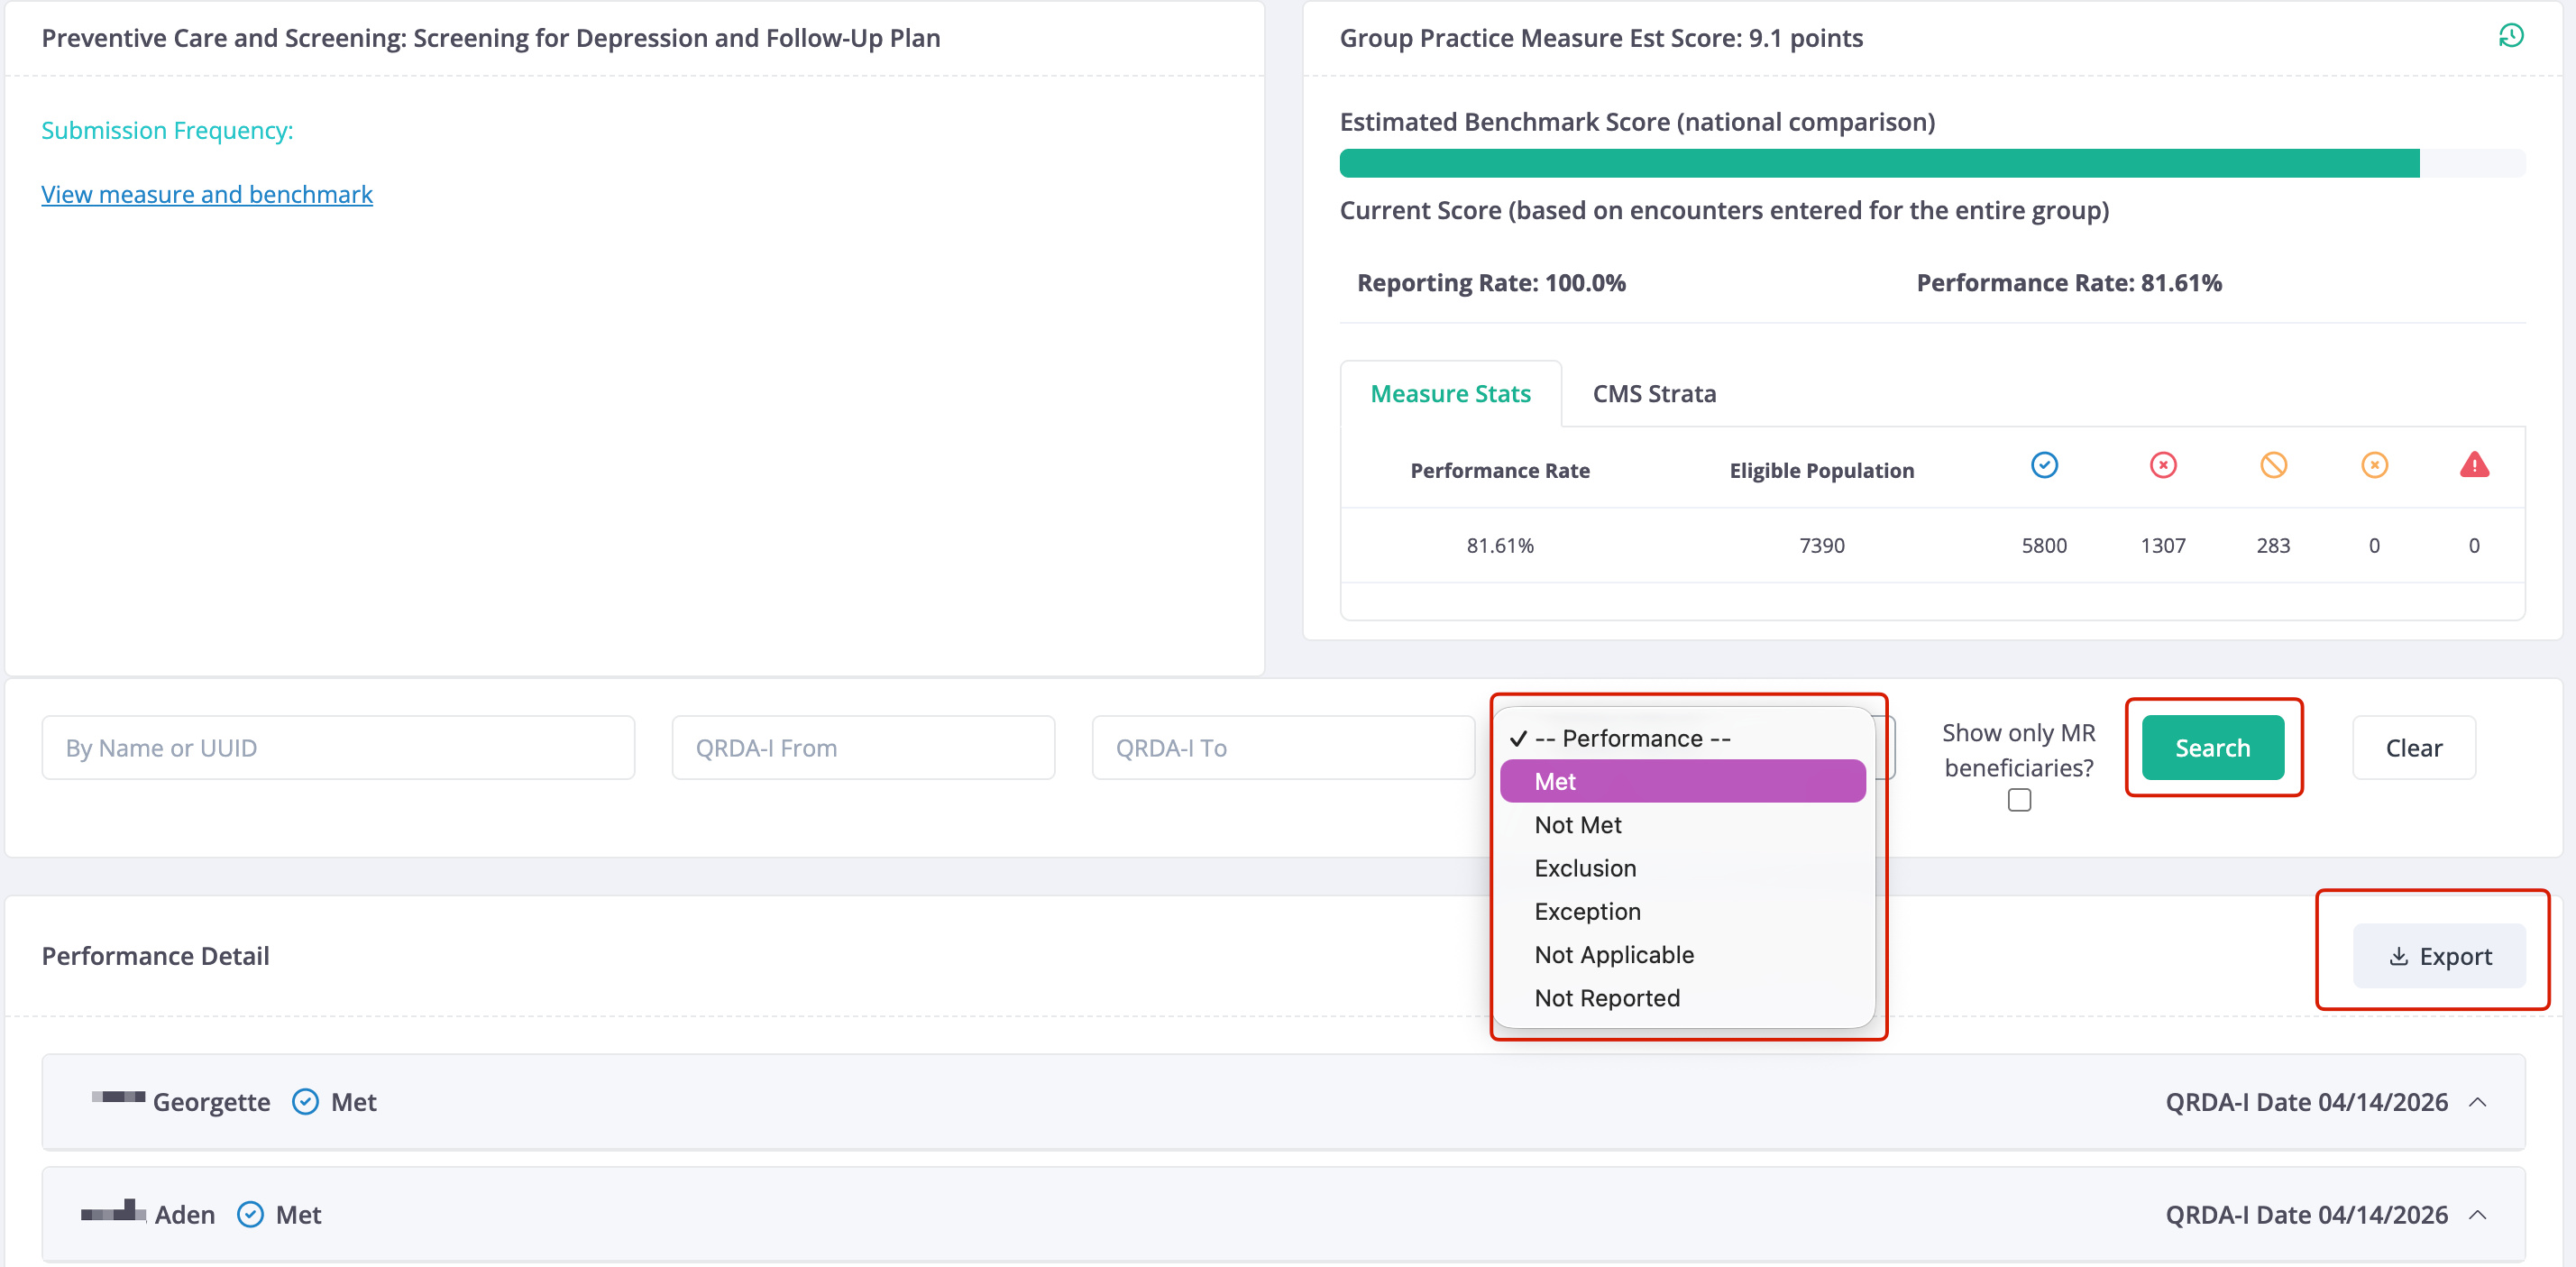
Users will have the ability to export patient level data for each measure by first clicking on the measure number. This will bring the user to the Performance Detail page. From here, users can export the full patient list using the "Export" button.
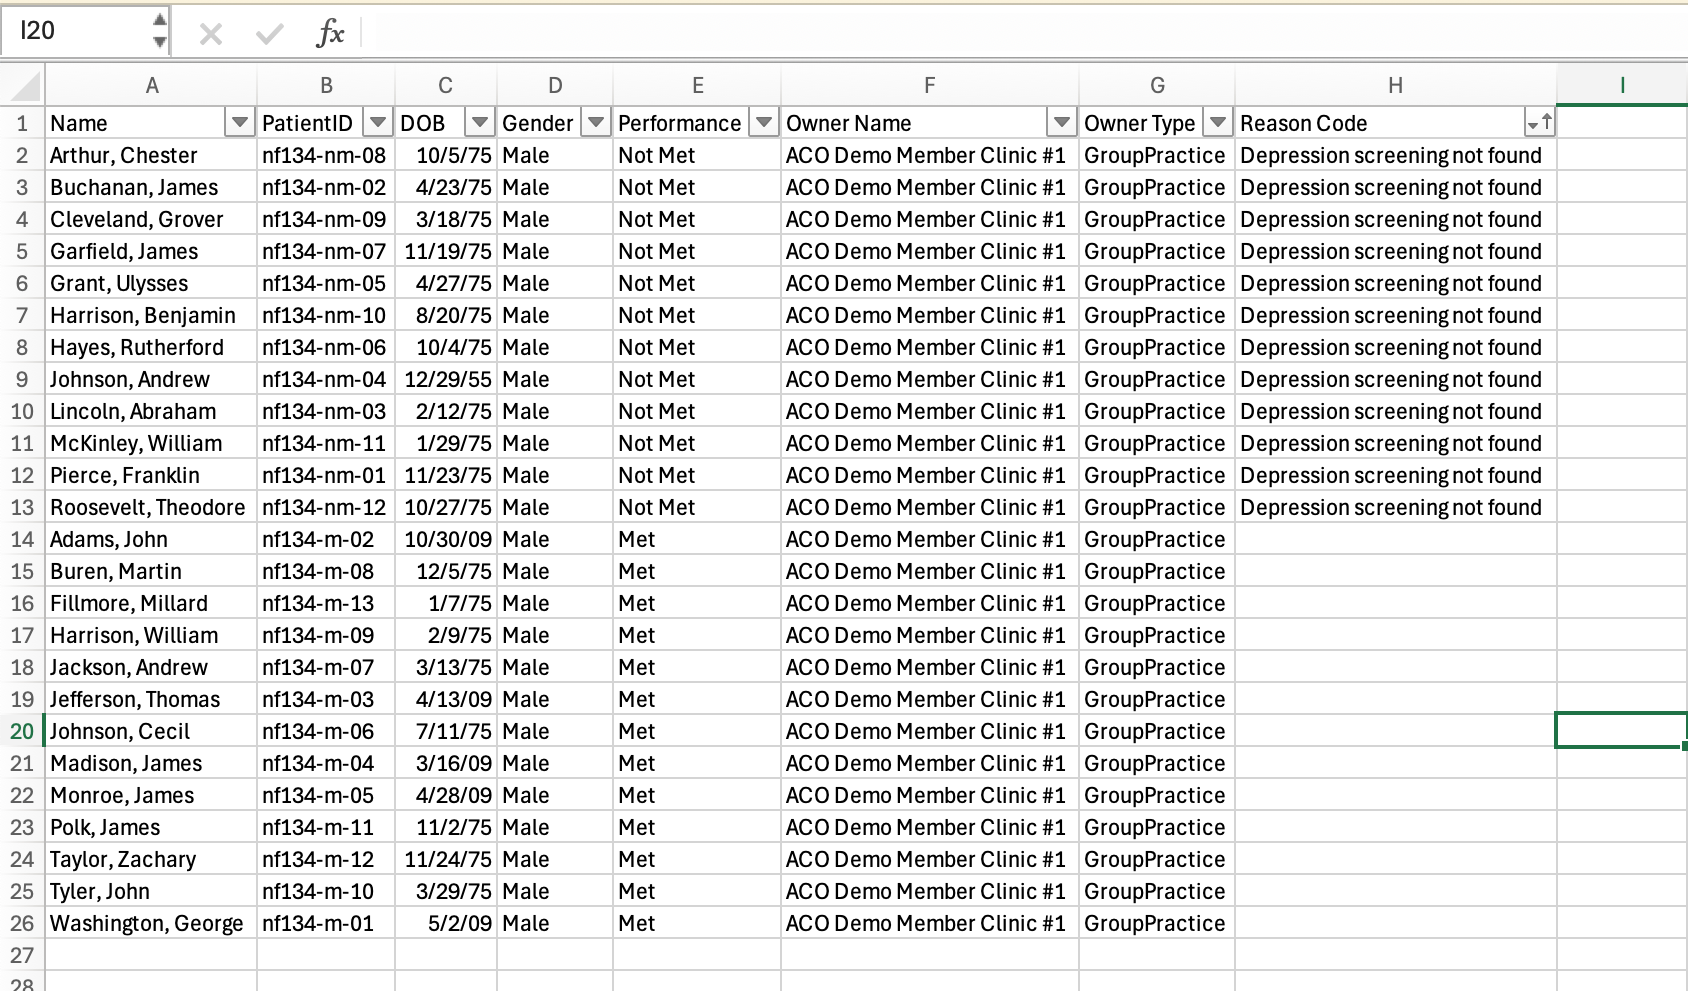
It is recommended that the "Filters" are used to view patients of a specific performance (Met, Not Met, Exclusion, etc.). The export will include the following columns: Name, PatientID, DOB, Gender, Performance, Owner Name, Owner Type, and Reason Code.
Imports
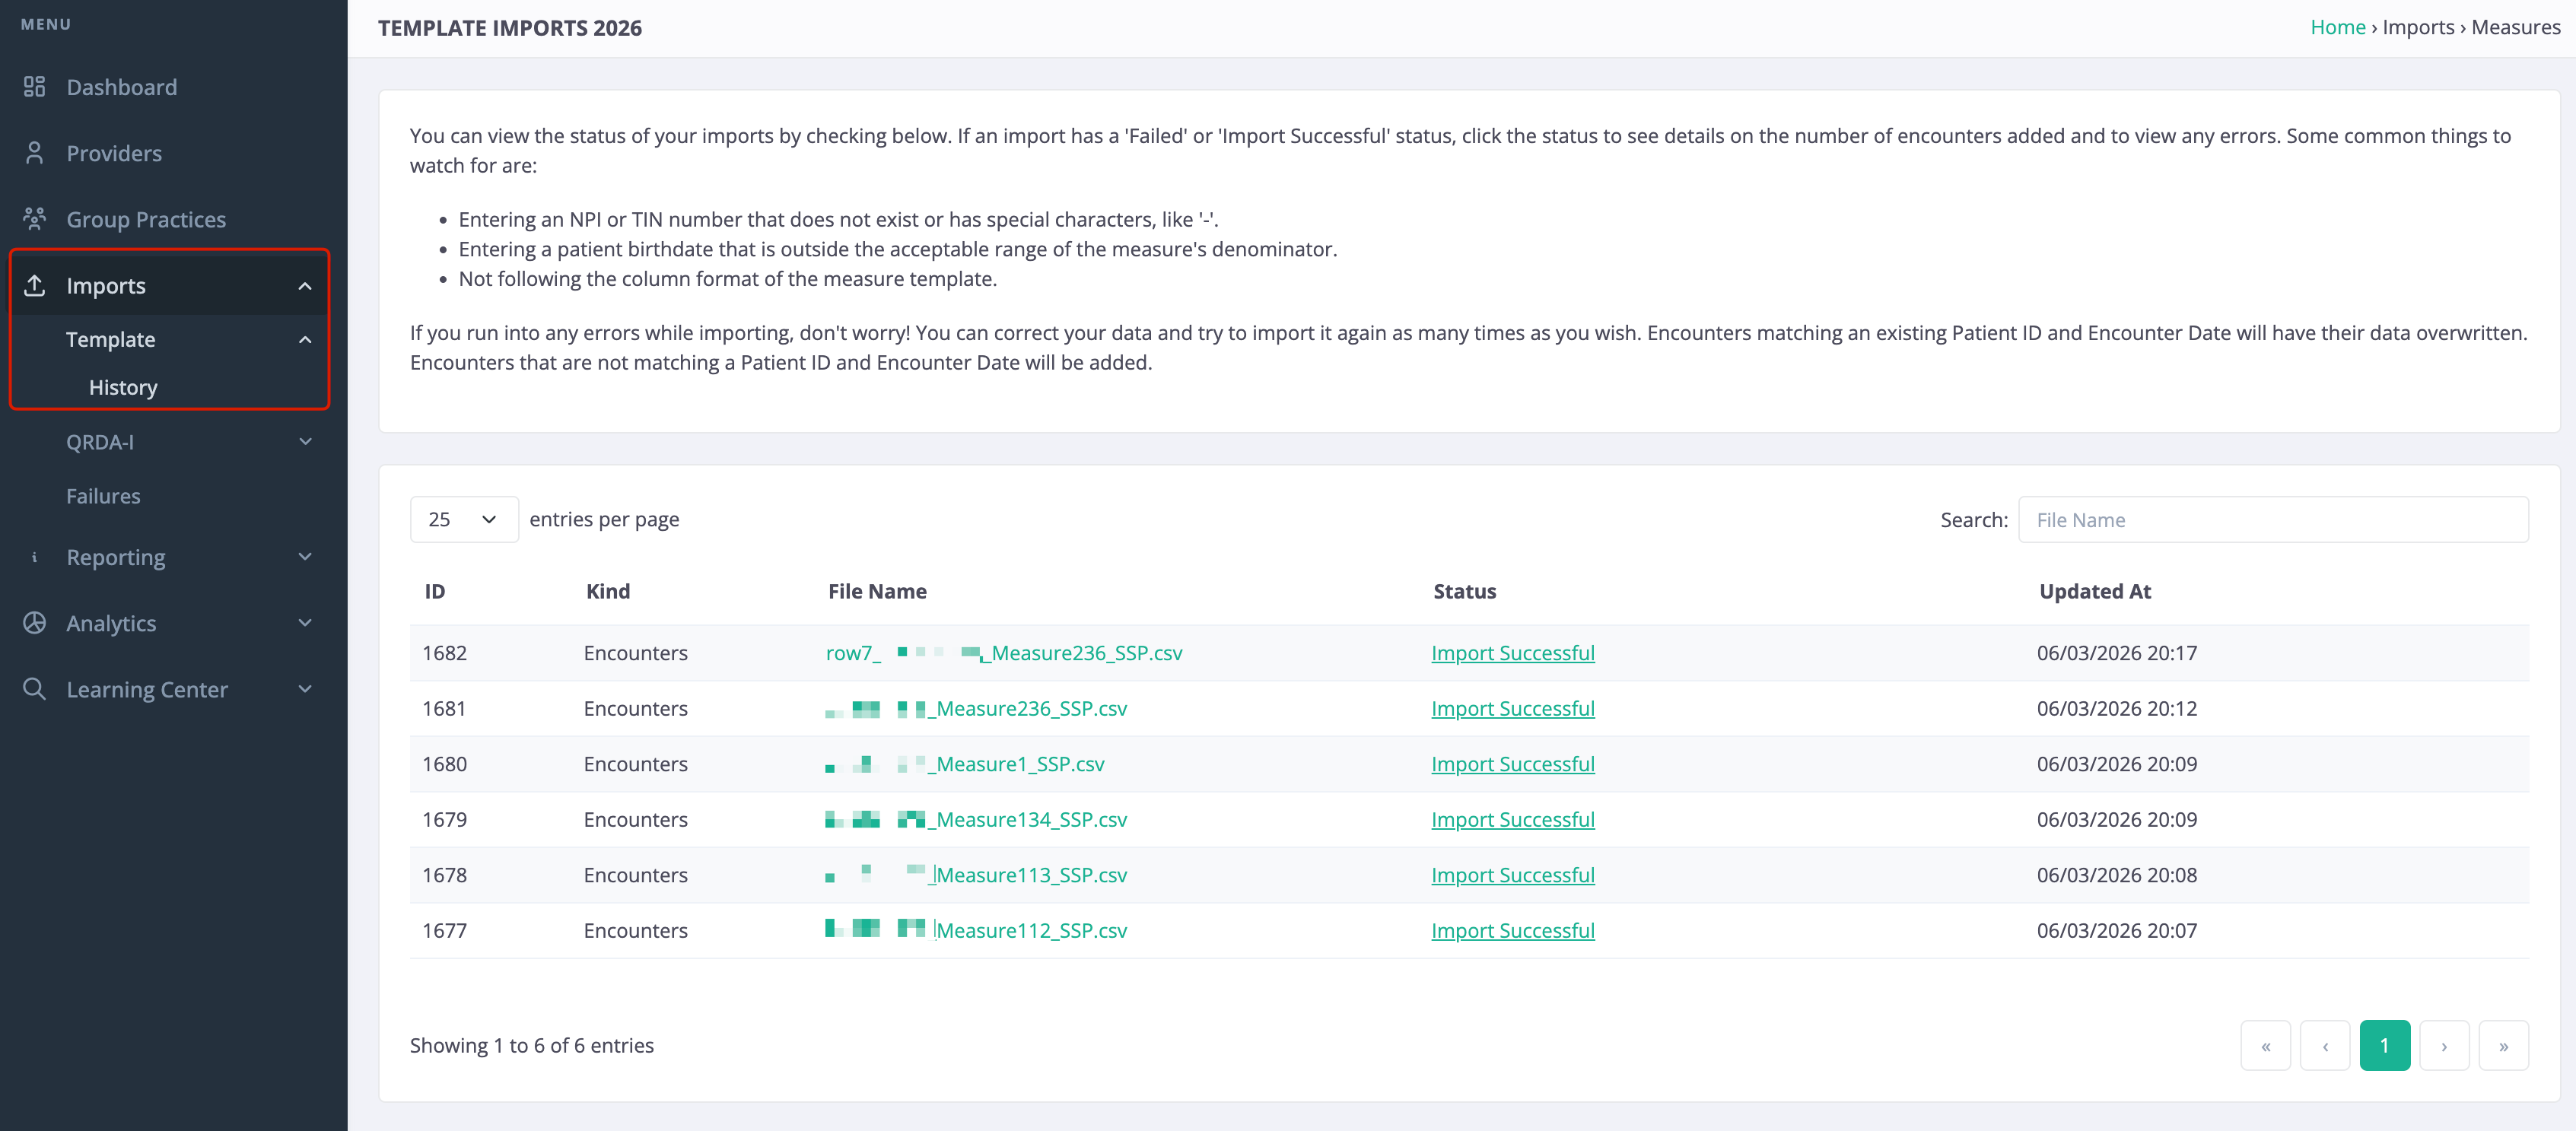
The Imports tool allows a user to view the clinic's history of Template data, import and view a history of QRDA-I Zips & XML files, and all Import Failures.
Template
Under Template, the user can view a history of CQM and/or Medicare CQM Template data. For additional details and guidance on template data, check out this article: XLSX Template Drag and Drop
QRDA I
ZIP Files
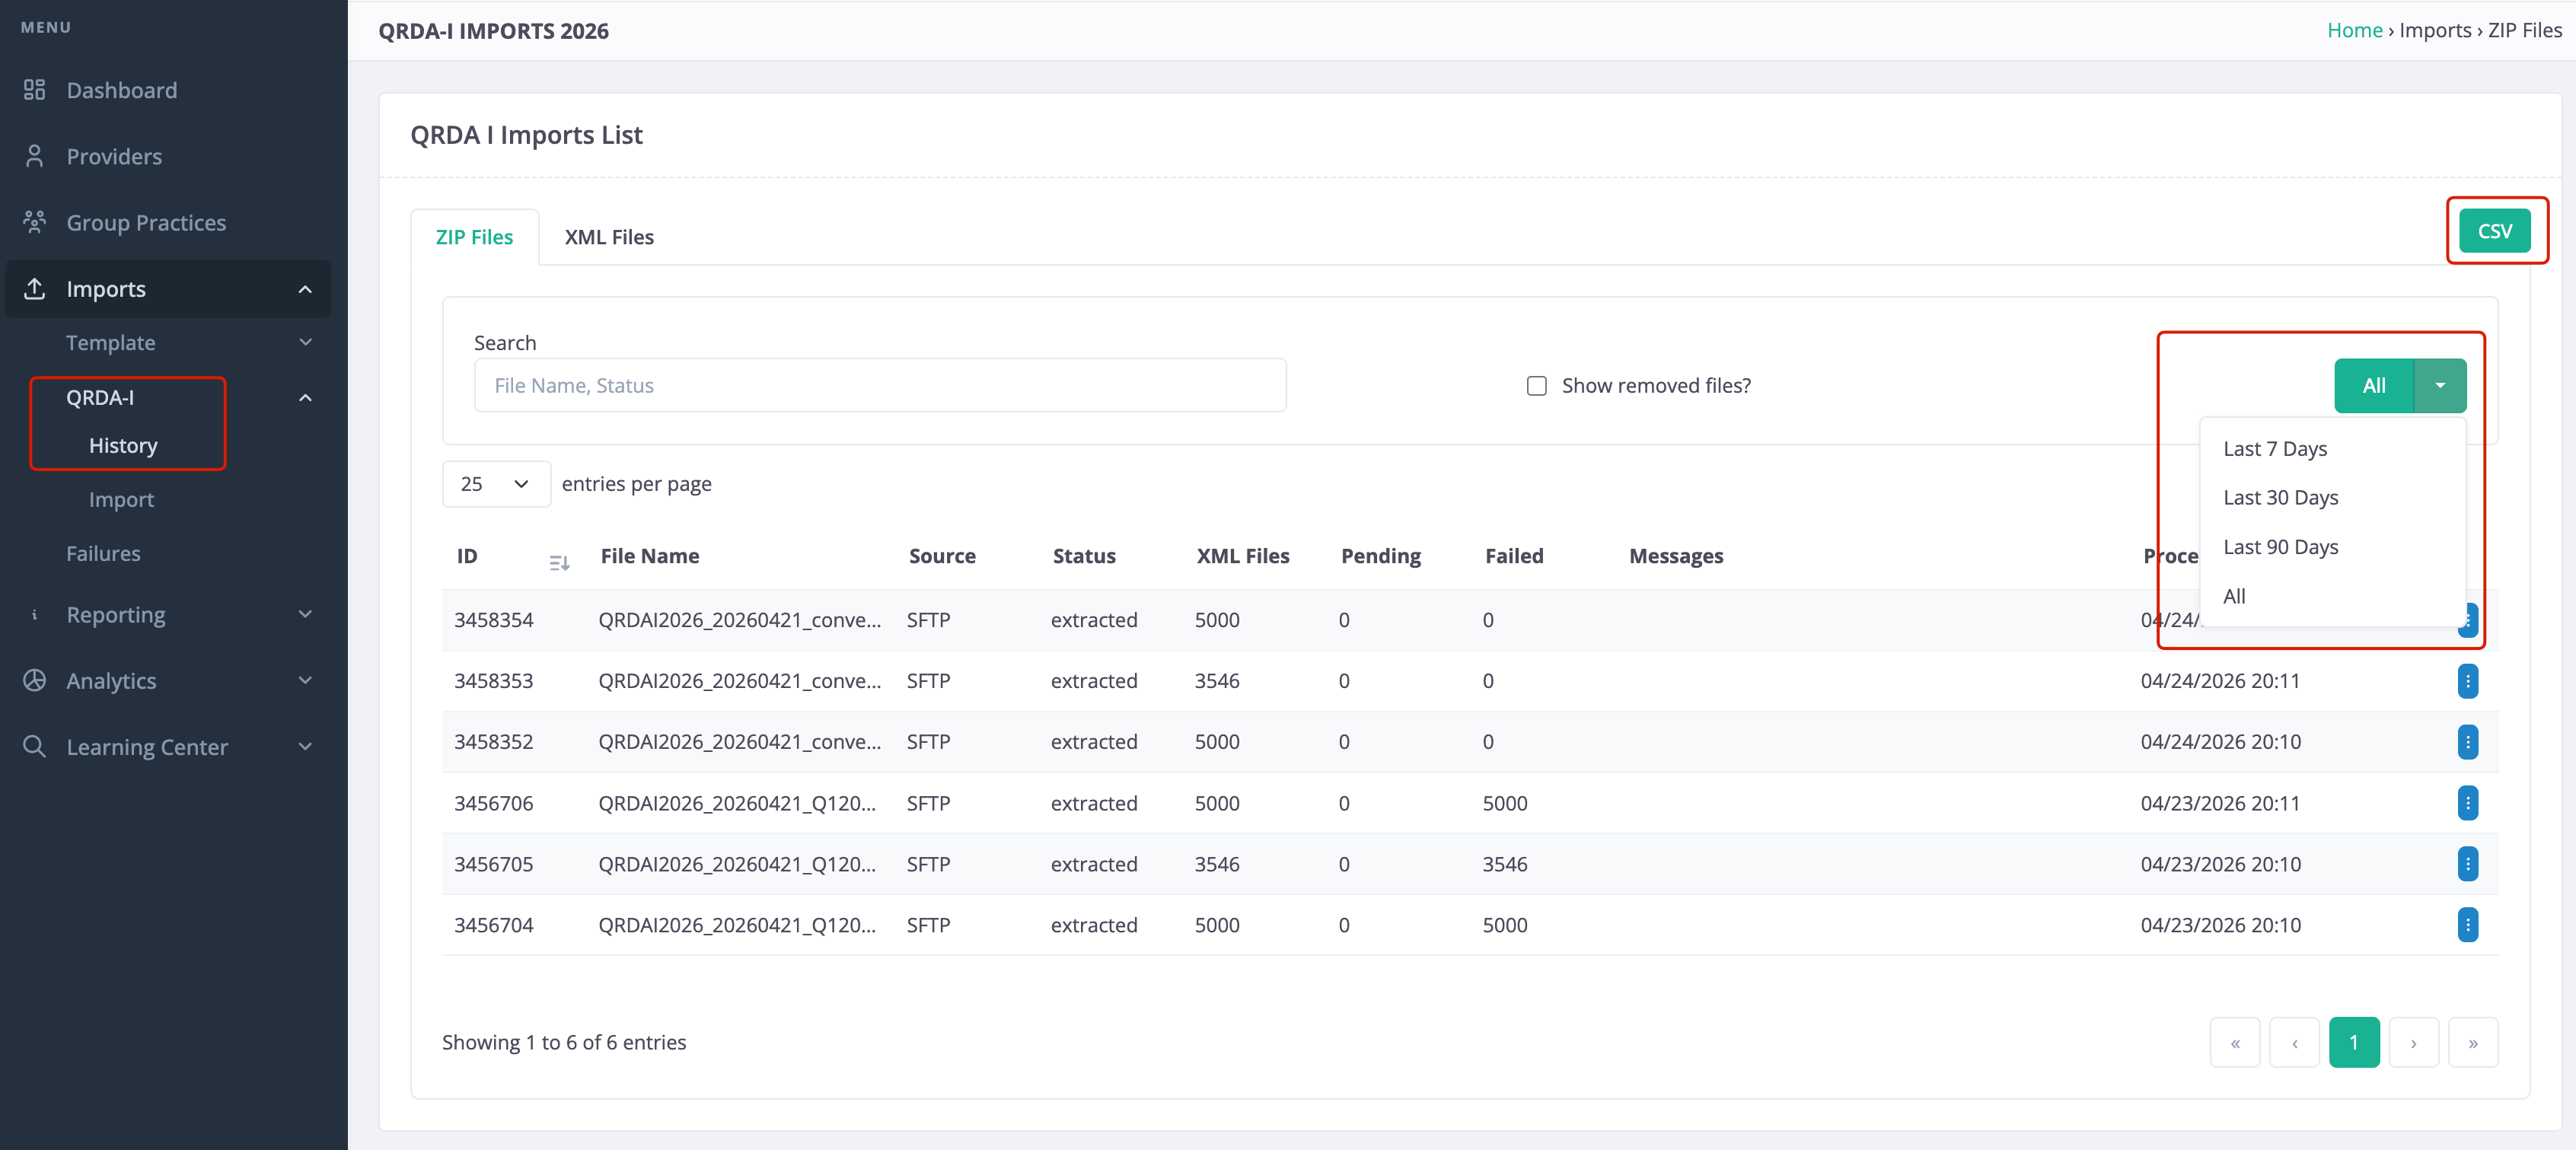
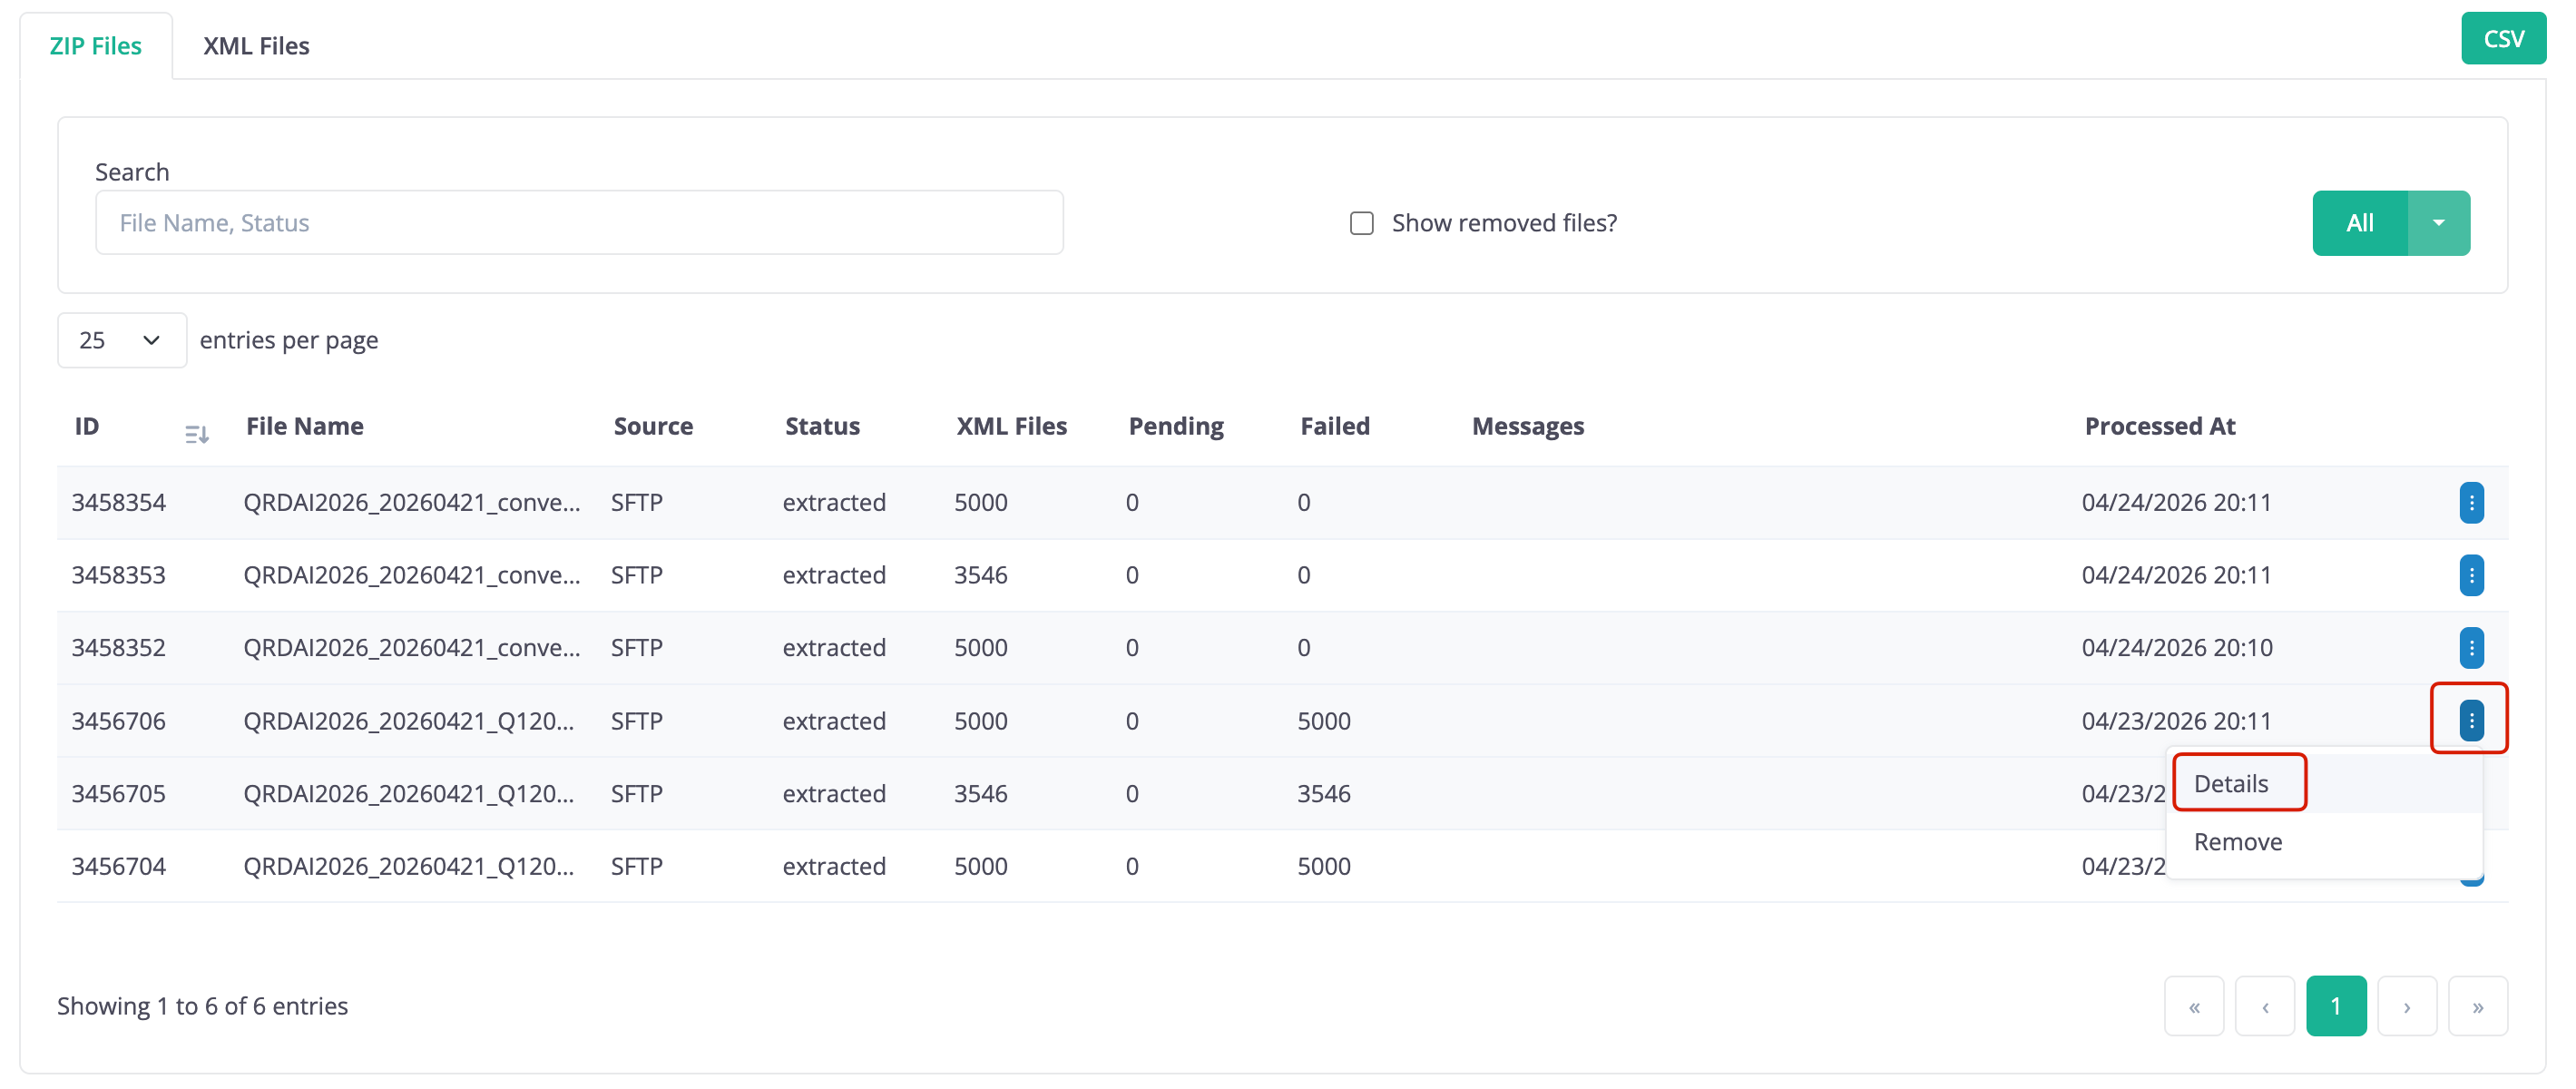
Under QRDA I, the user can view a history of all zip files that have been uploaded to the clinic. This list can be exported by clicking on the CSV button. Note - the history of zip files will default to view the last 7 days, to view older files, click the drop down and choose between the last 30 days, 90 days, or all zip files.
This view includes a count of the patient XML files found within each zip folder and an overview of files that are pending or failed.
QRDA I ZIP File Summary
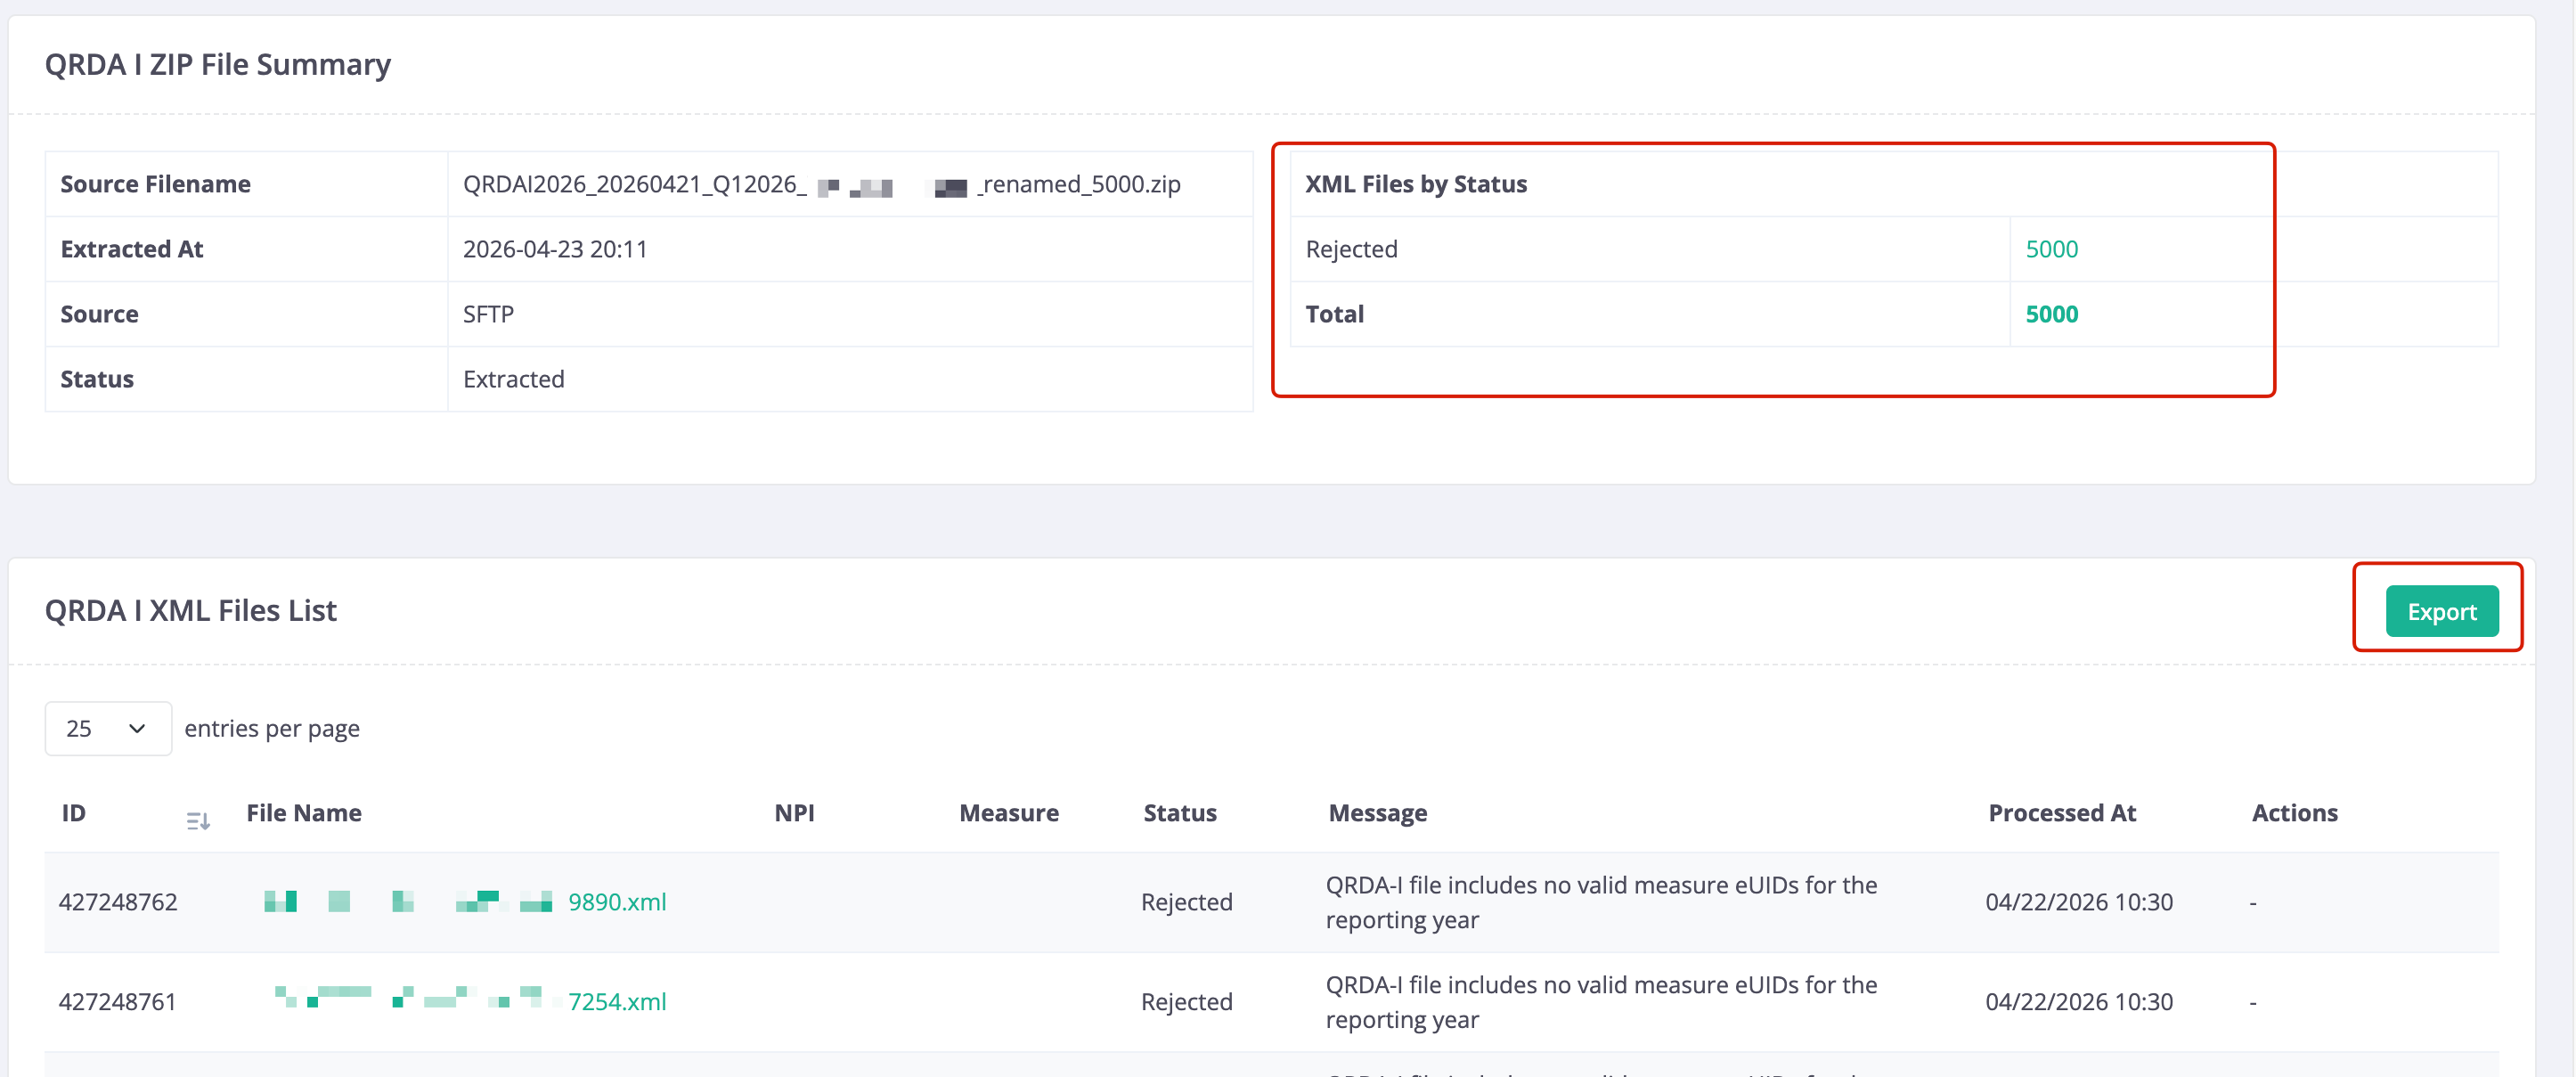
For a summary of the contents of each zip file, click on "Details". From here, you'll see XML Files by Status. In the example below, all of the XML files were rejected. Clicking on the number of rejected files (5000) will organize the list to show all rejections first. This list can be exported by clicking on the "Export" button.
XML Files
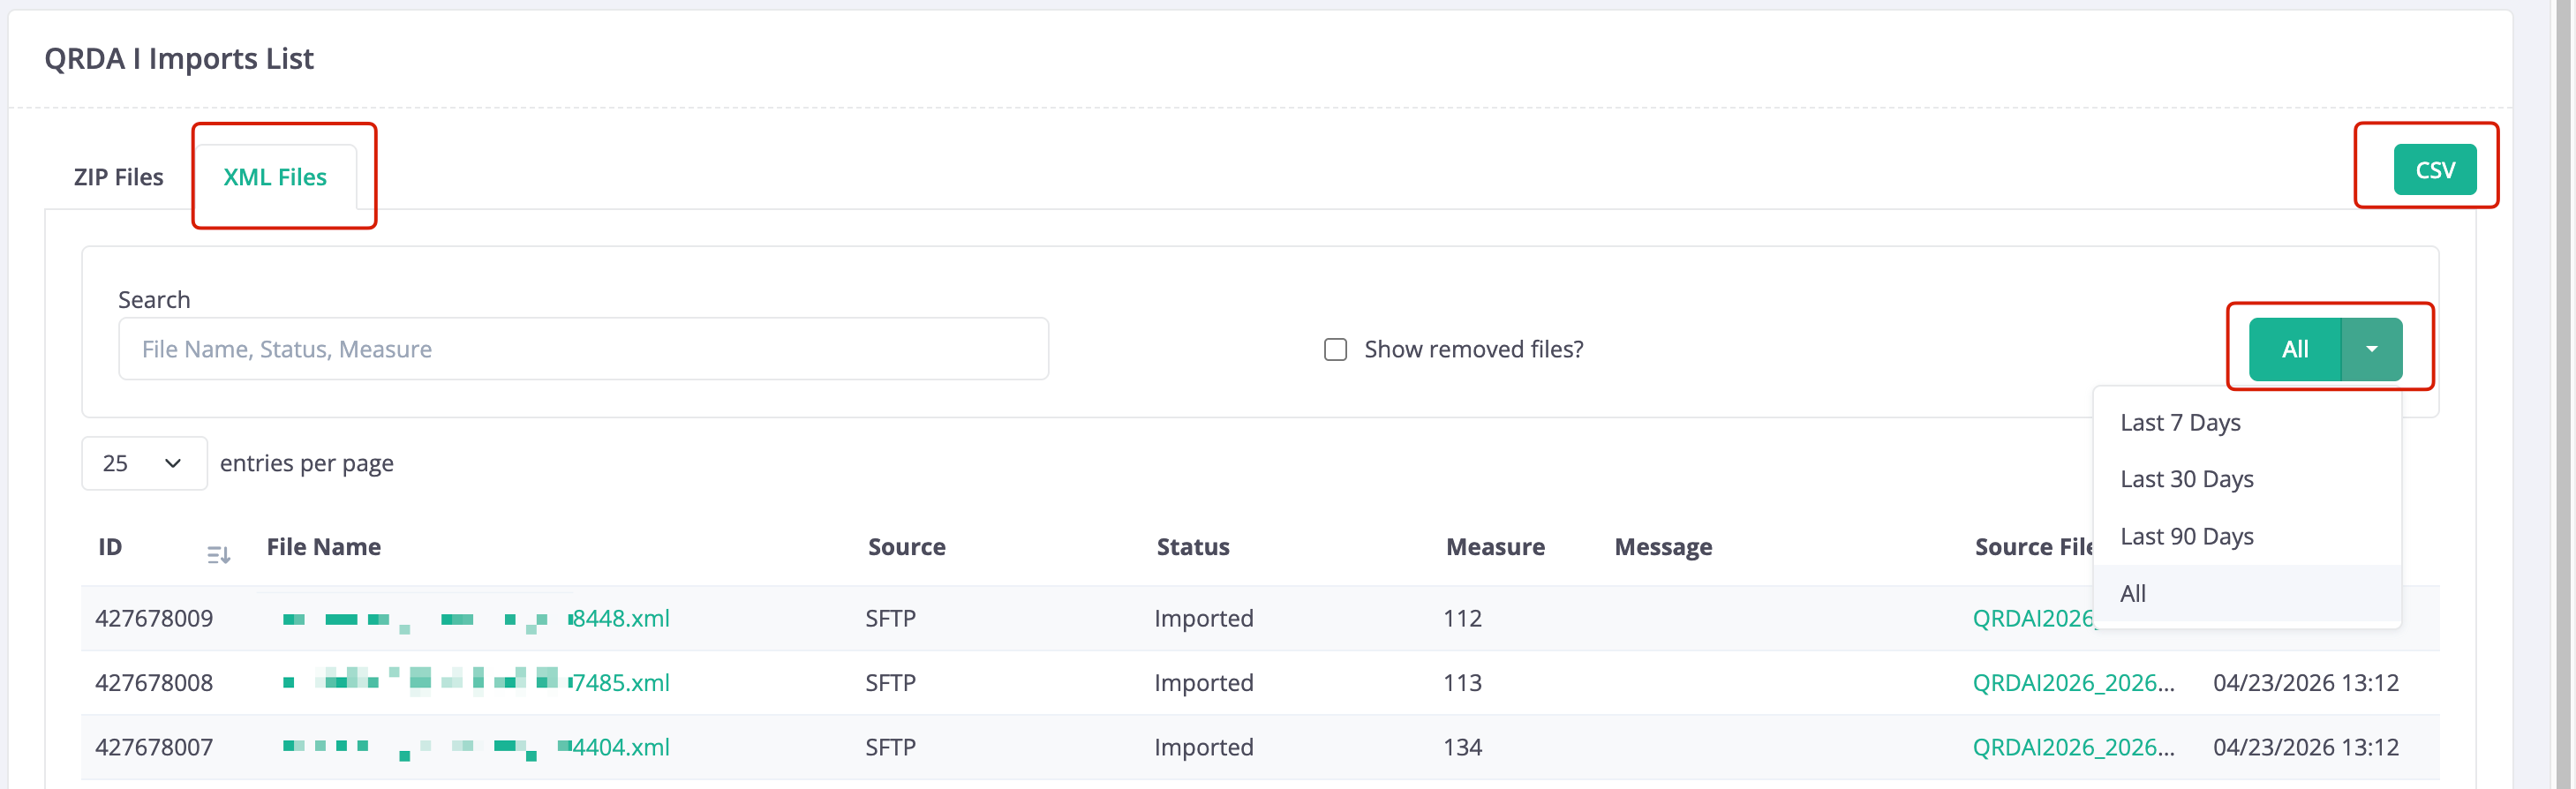
The user can also view the full list of patient XMLs that are found within the zip files. This view includes a status of queue, imported, or rejected and can be exported by clicking the CSV button. Note - the history of xml files will default to view the last 7 days, to view older files, click the drop down and choose between the last 30 days, 90 days, or all zip files.
Importing QRDAs
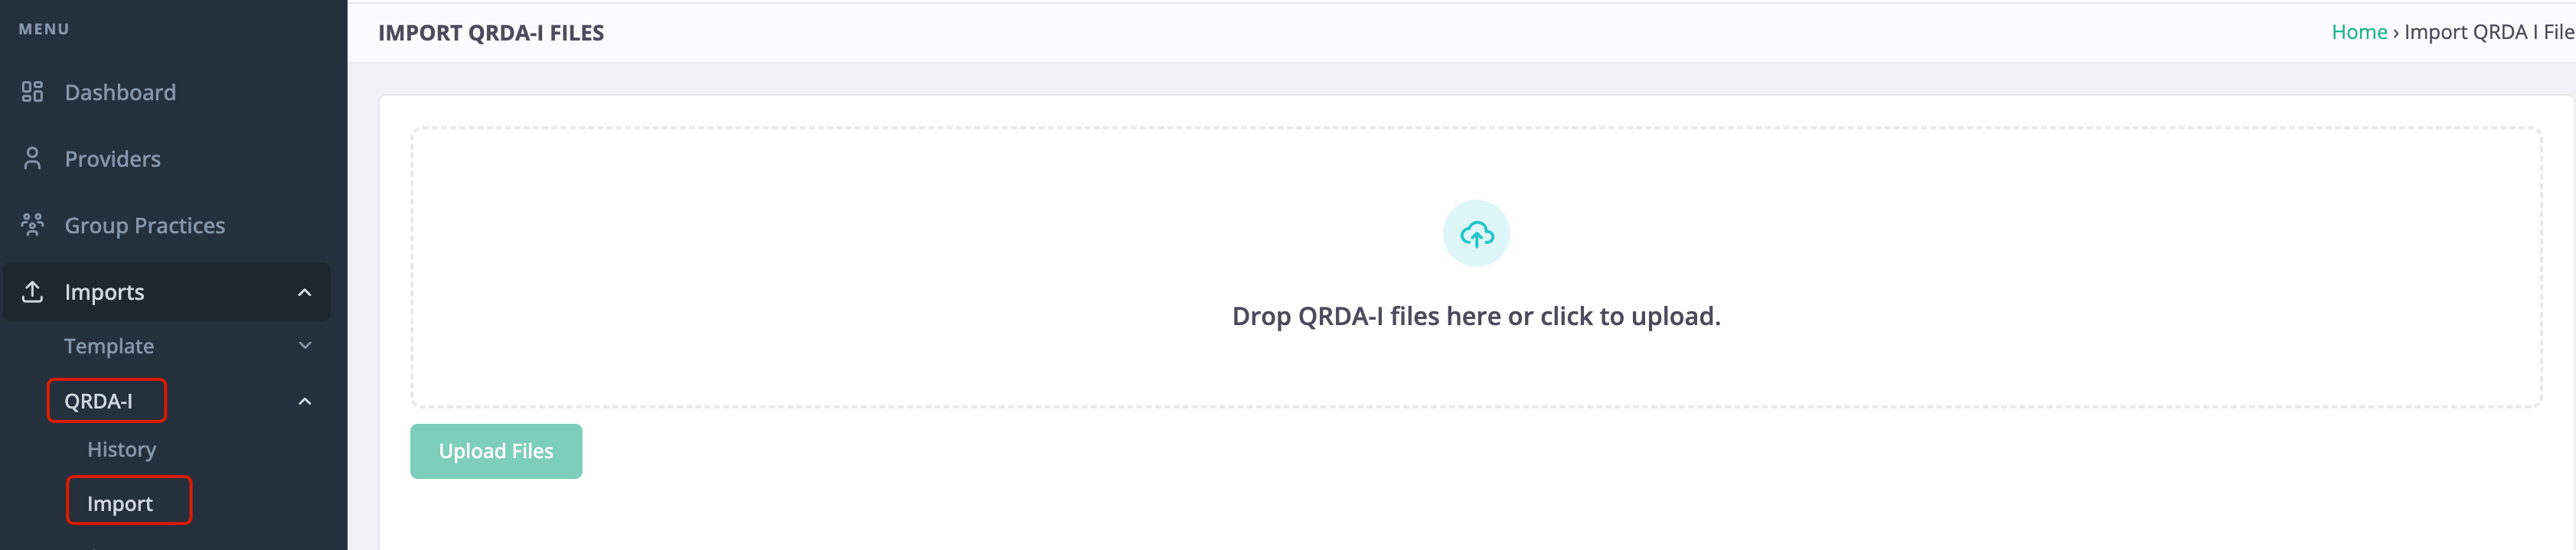
Users can also import QRDA I zip files via Drag and Drop. For additional details and guidance on this method of uploading data, check out this article: Uploading QRDA-I Files via Drag & Drop
Failures
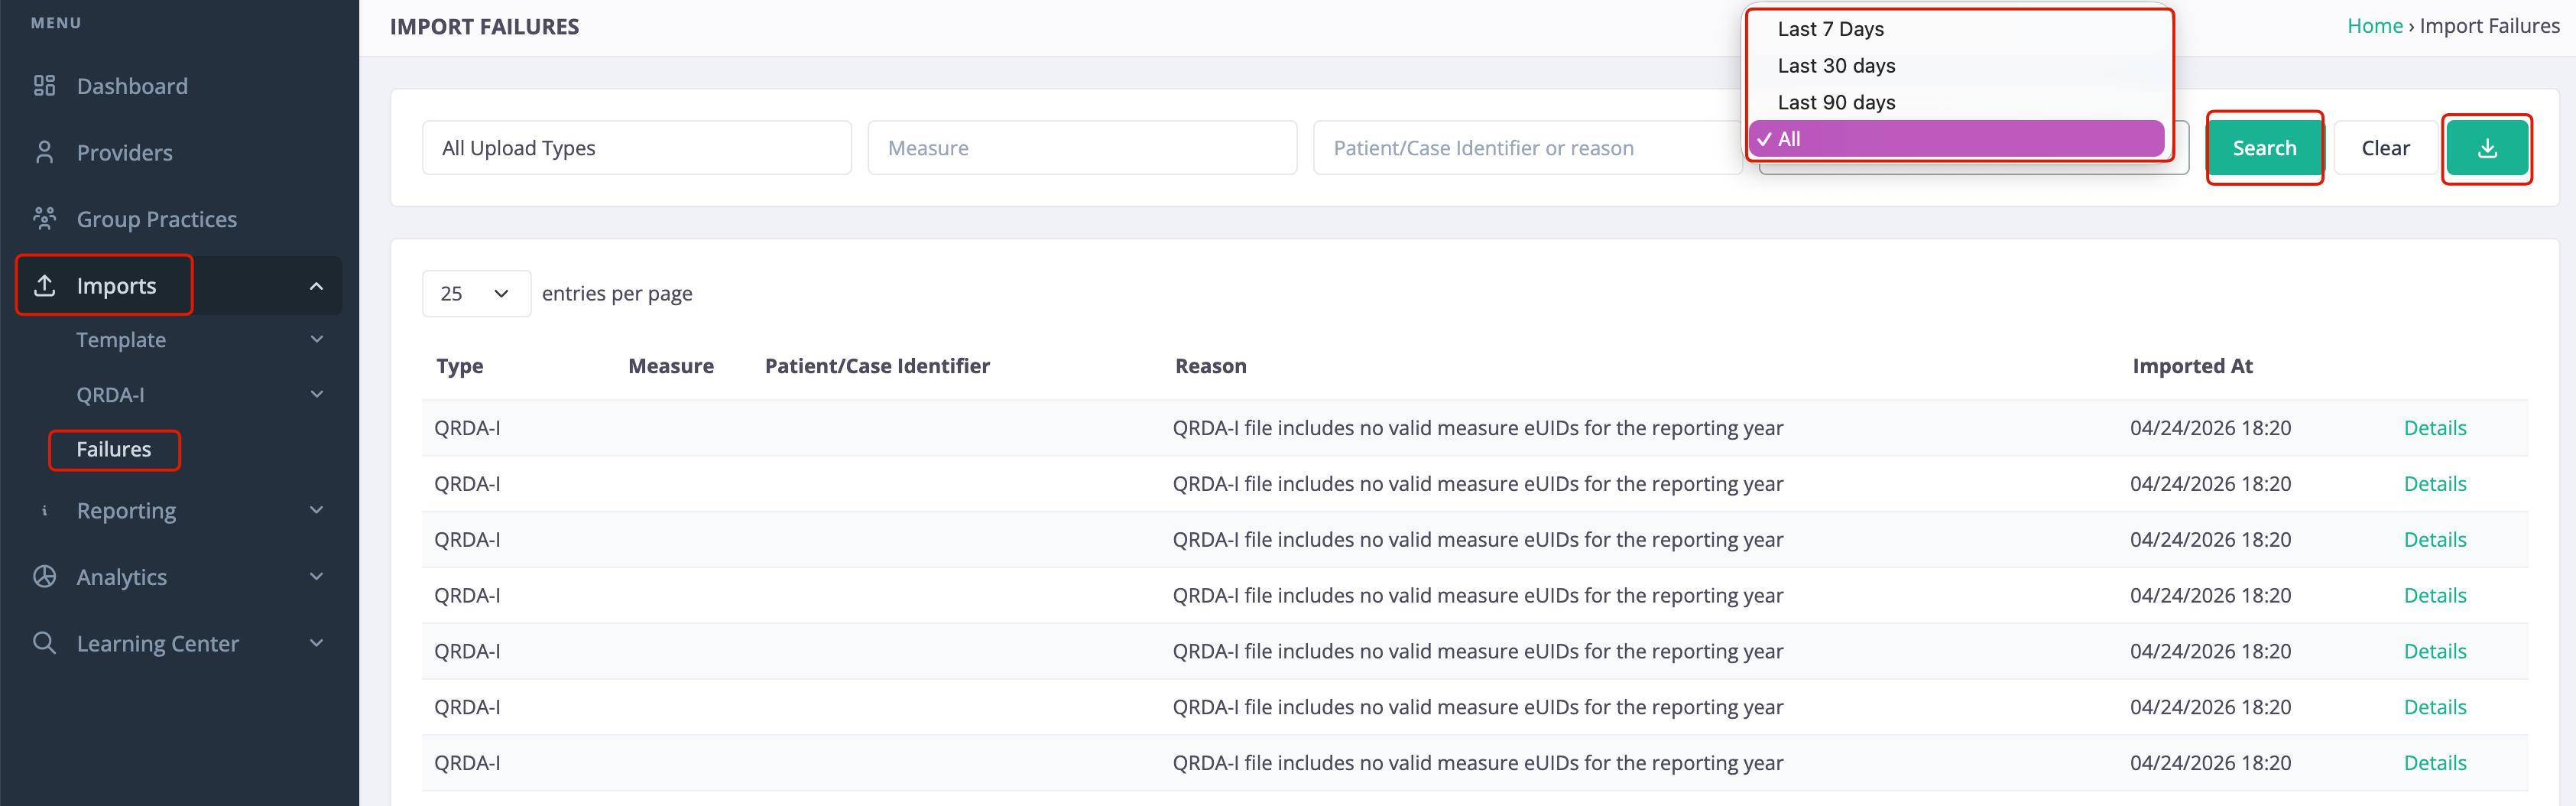
Under Imports, users can view all Import Failures.This list will default to view the last 7 days, to view older files, click the drop down and choose between the last 30 days, 90 days, or all zip files and click Search. Users can also export this list by clicking the download button.
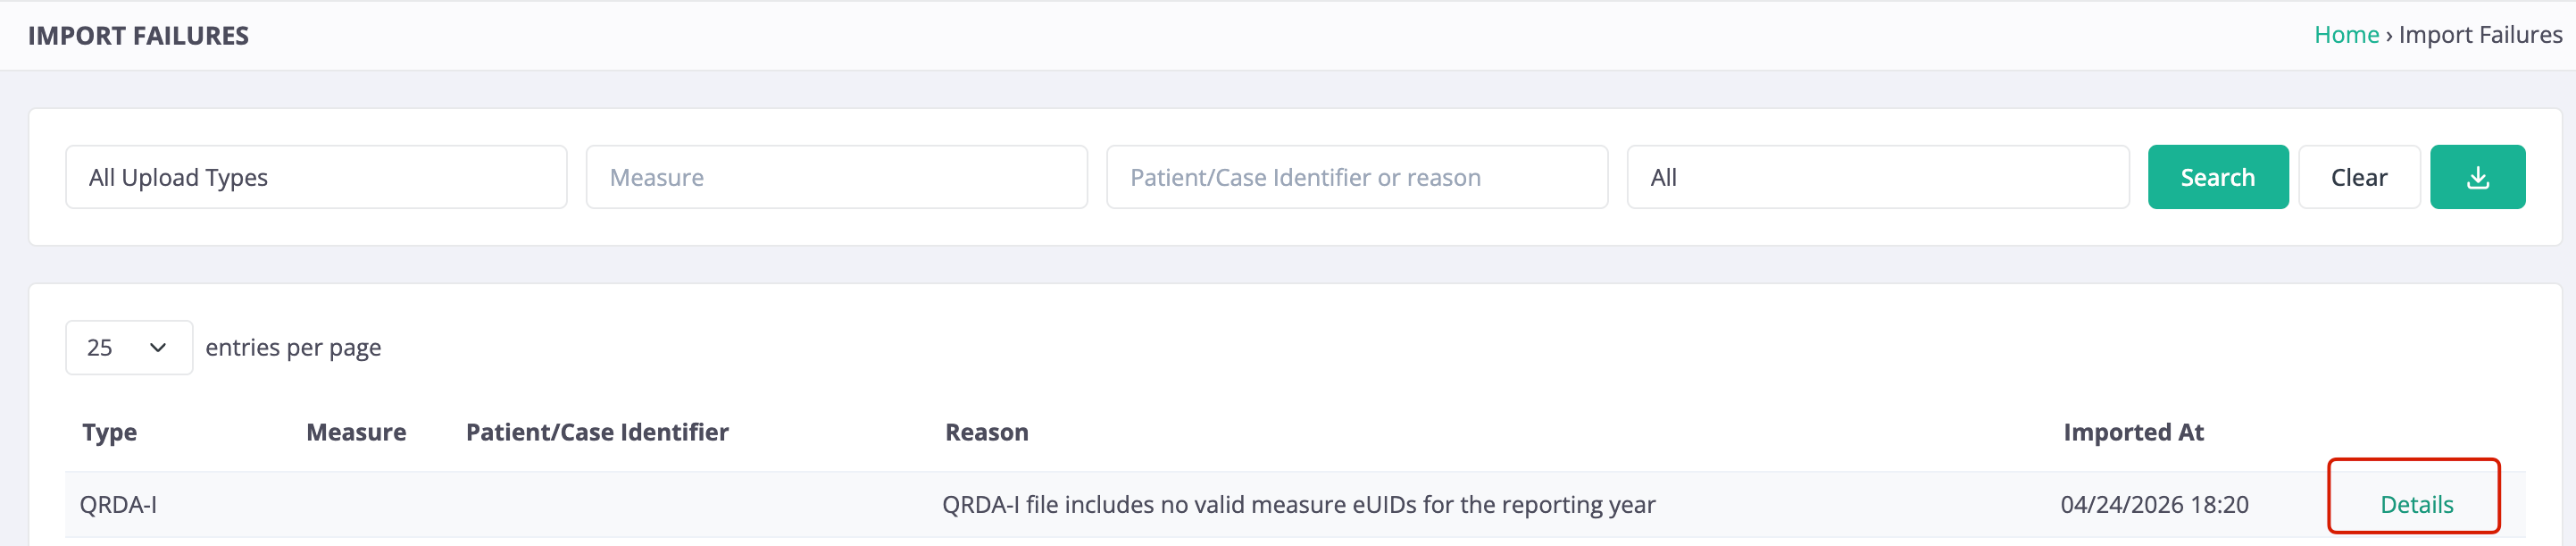
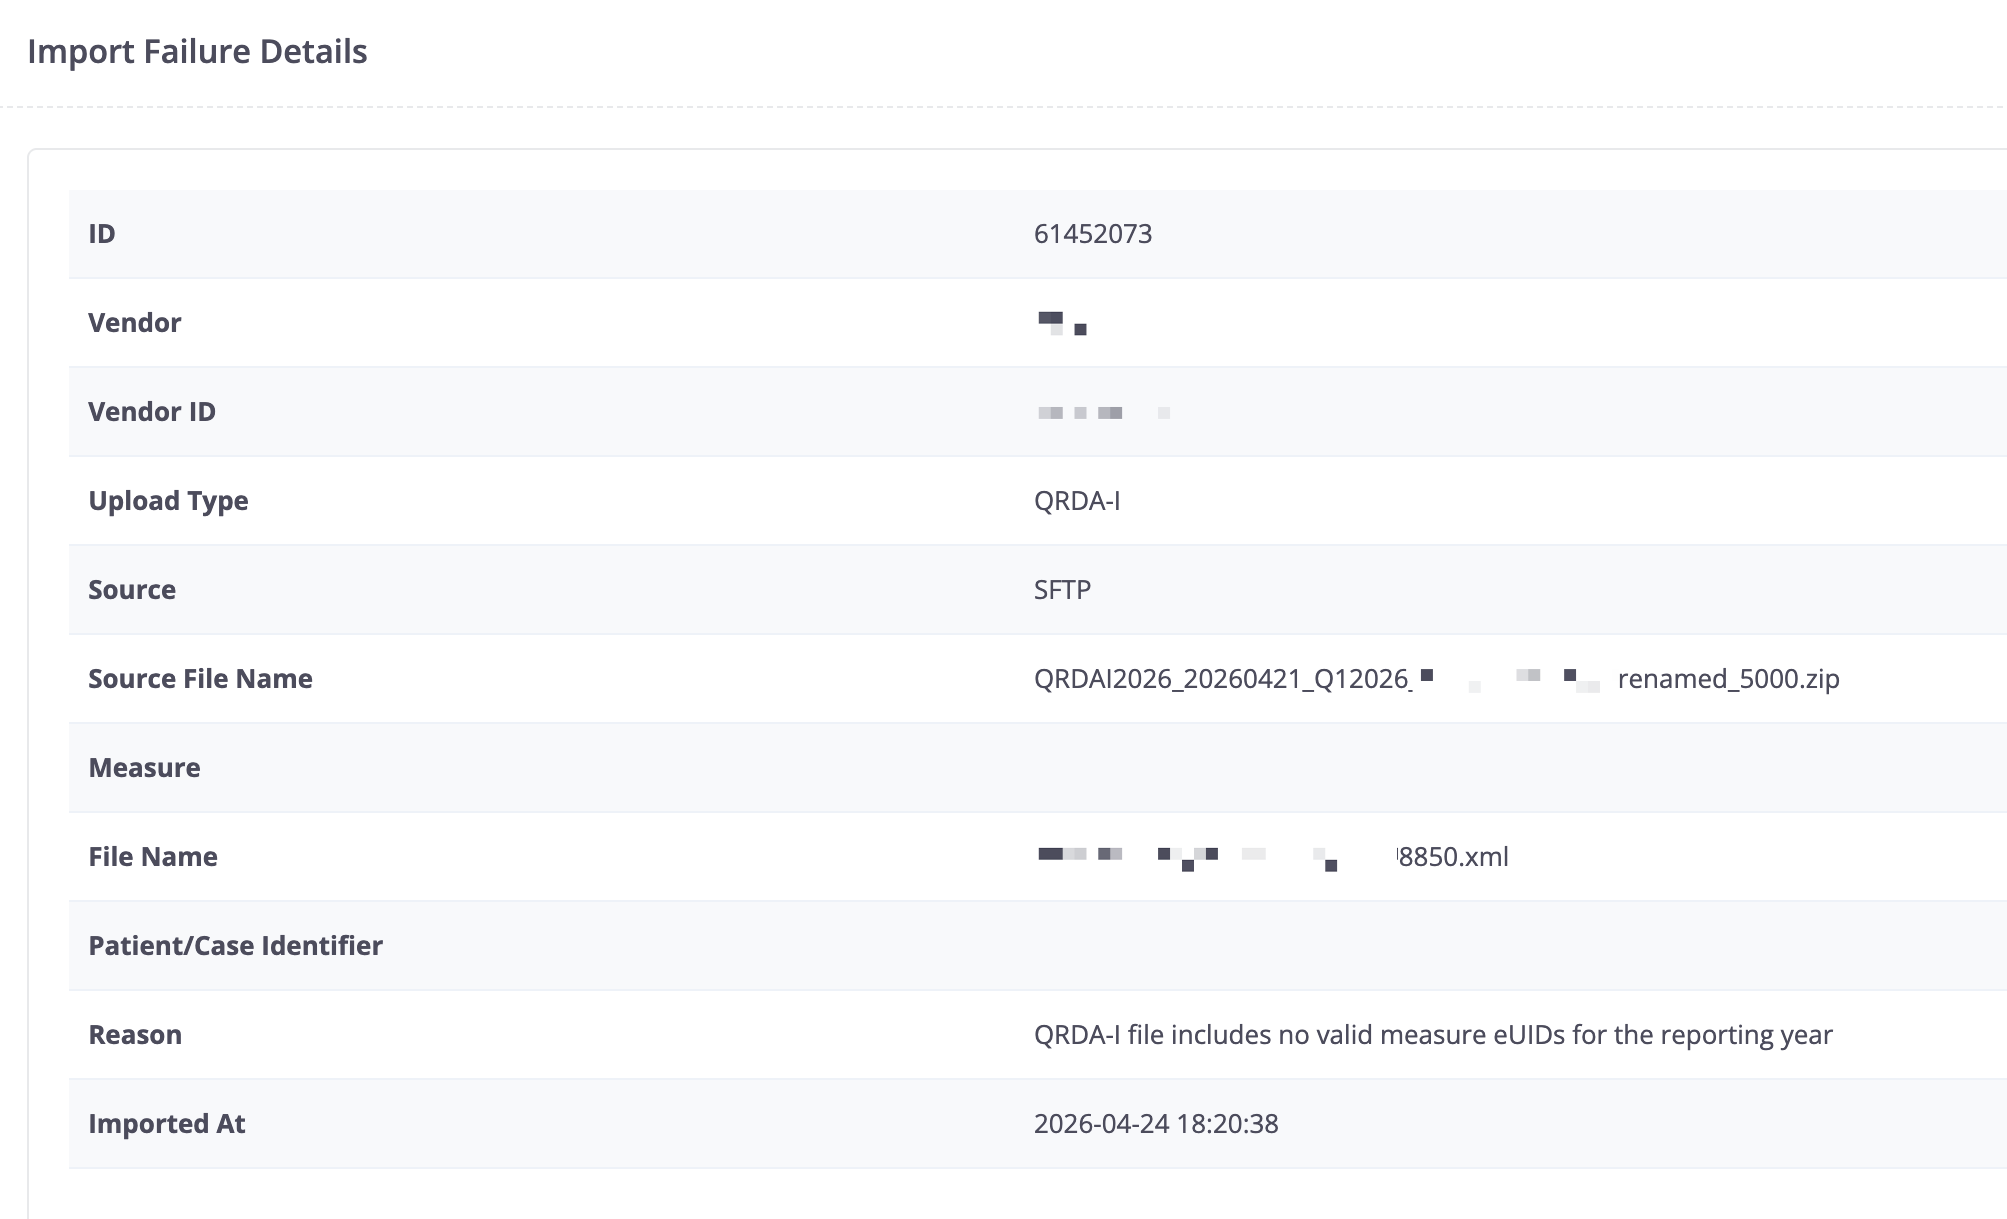
The export will include columns for the source file name and file name, however that information can also be seen by clicking on "Details" next to individual failures.